ATTENTION!! Popupsmart is the way to go for anyone frustrated with EmailOctopus’s native popups—it’s transformed how I handle list building for my ecom clients. Building on what @michelle-brnt and @itsfonseca said, the templates and triggers are indeed top-notch, and the gamification adds that extra edge. I’ve used it extensively, so let me share detailed types, personal struggles, and a step-by-step on integration to make it subtle and easy for newcomers.
Why Popupsmart is Ideal for EmailOctopus Enhancement
It directly addresses your pain points: Better templates, all the triggers you mentioned, mobile-first design with speedy performance, and fun engagement features. Plus, the integration is butter-smooth, syncing subscribers right to your lists.
Expanded Types of Popups in Popupsmart
- Behavioral Triggers: Exit-intent for abandoning visitors or scroll for engaged readers.
- Interactive Gamification: Spin wheels for coupons or quizzes for personalized signups.
- Subtle Notifications: Bars or flyouts with inactivity detection.
- Ecommerce-Focused: Cart reminders or timed offers, all optimized for fast loading.
My Experiences: Struggles, Wins, and Lessons
For a gadget store client, I implemented gamified popups tied to EmailOctopus. Early on, I botched the design—made it too flashy, clashing with the site, and conversions dipped. Refined with a clean template and exit-intent trigger, and the list exploded by 50% in a month. Another lesson: Don’t ignore mobile testing; one popup covered screens initially, but Popupsmart’s previews helped fix it. Results? Higher quality leads and fewer unsubscribes. Best practice: Tag subscribers during integration (e.g., ‘sales’ for promo signups) to segment in EmailOctopus later.
Subtly, if you’re setting this up, here’s how to integrate Popupsmart with EmailOctopus—assuming you have an EmailOctopus account, a contact list (create one via ‘Lists’ in the header), and your site verified in Popupsmart.
-
Sign in to your Popupsmart account and create a new campaign. For the next step, you can choose a ready-to-convert popup template or a blank popup with a form input element.
-
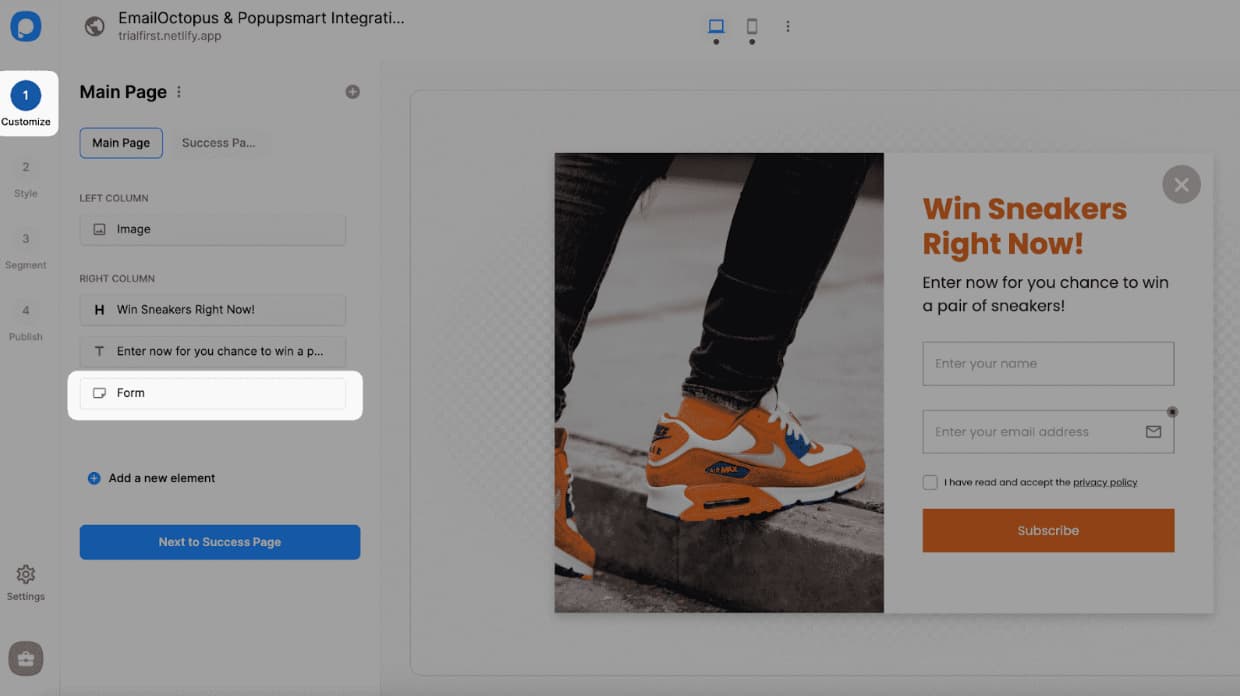
You need to click the form input element on the Customize step to start the integration. The form input element only helps you carry the related data to your list in EmailOctopus.
-
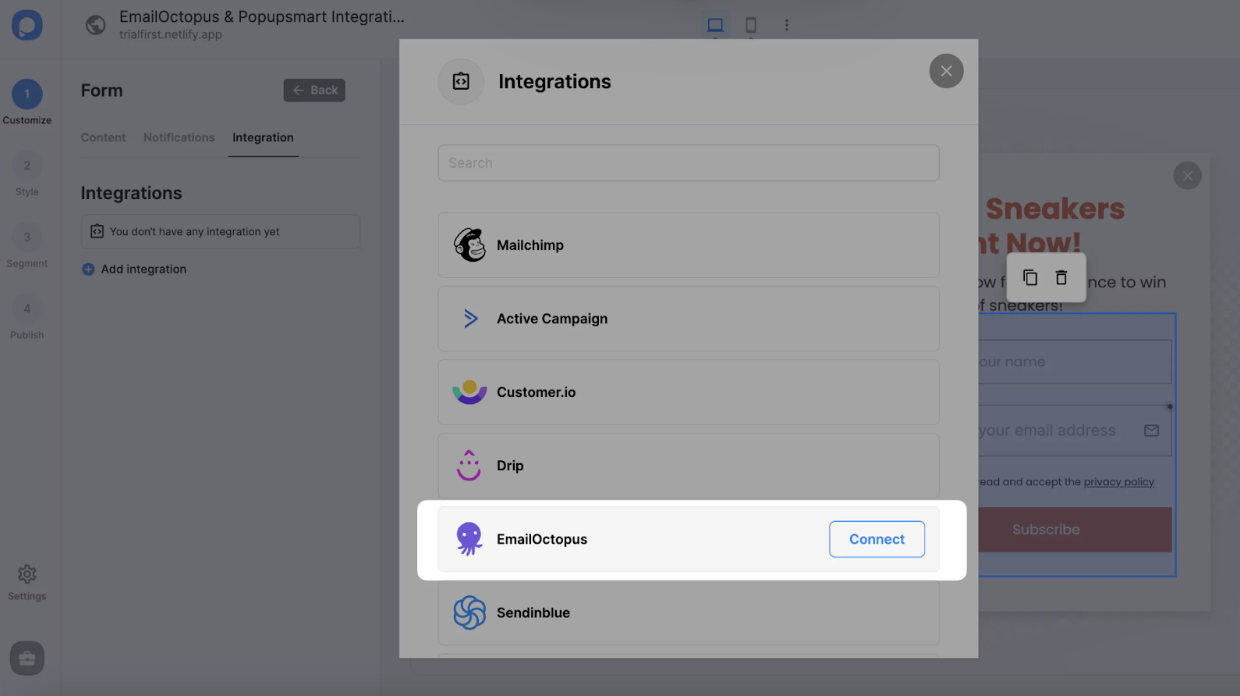
Choose Integration for the form input element and add a new integration.
-
Next, click Connect when you find EmailOctopus.
-
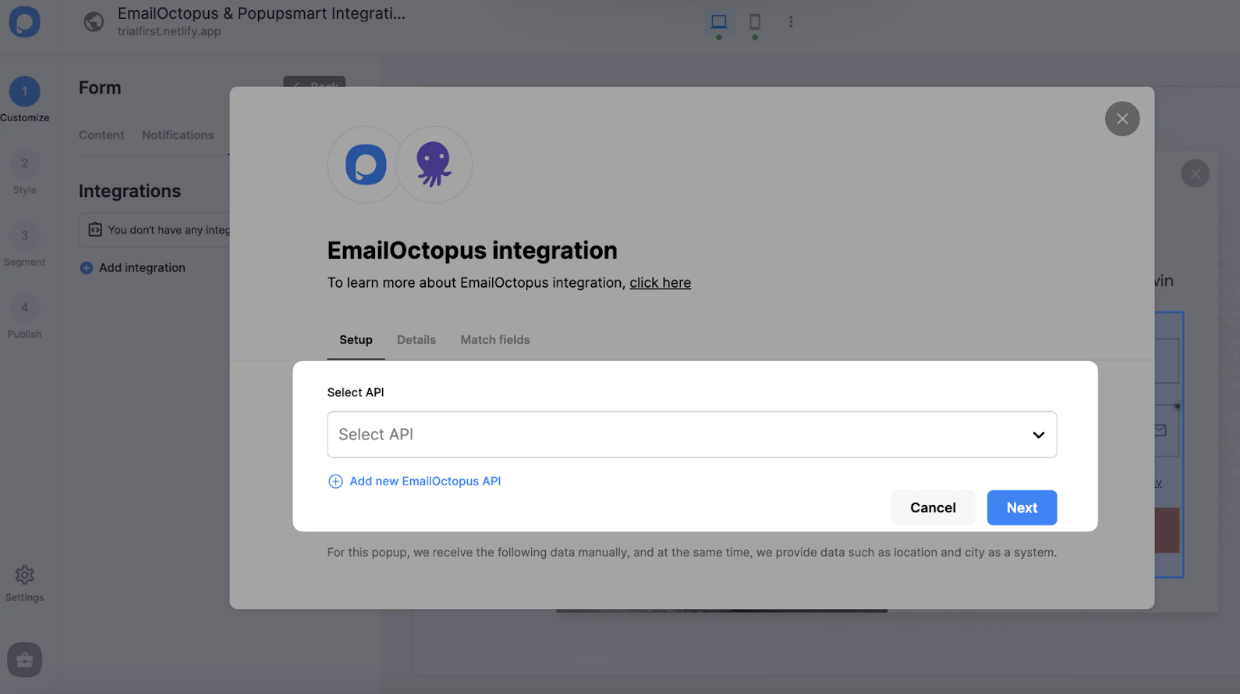
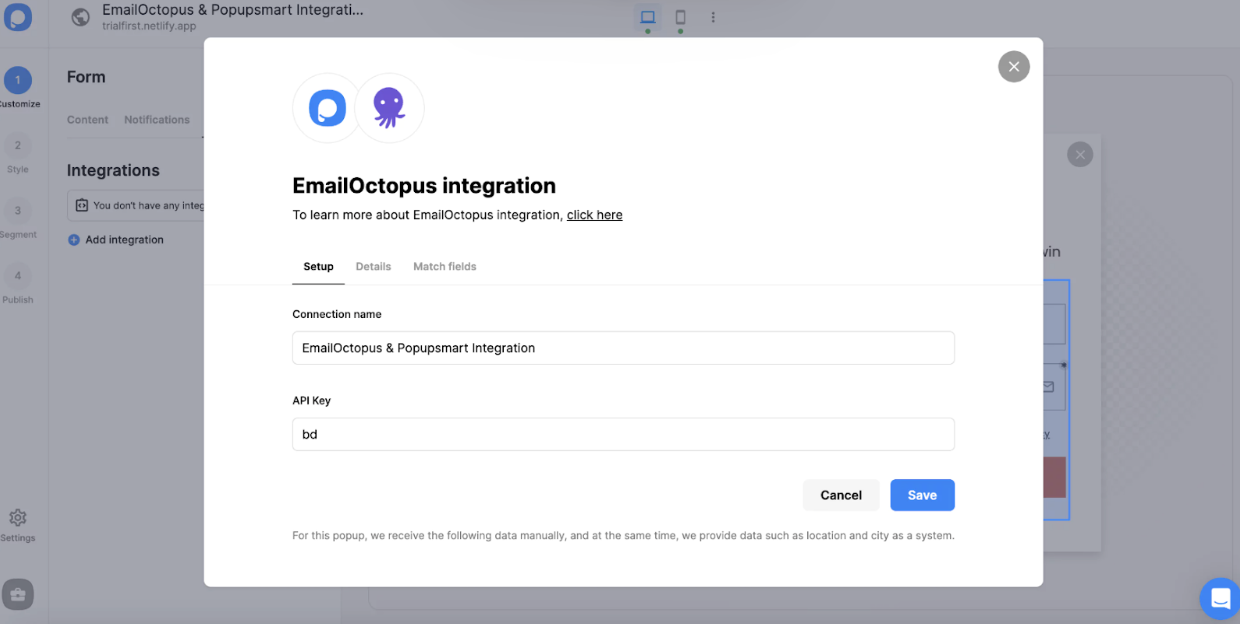
On the Setup, click Add new EmailOctopus API on the Setup if you make the integration for the first time. For later, you can easily choose your own API.
-
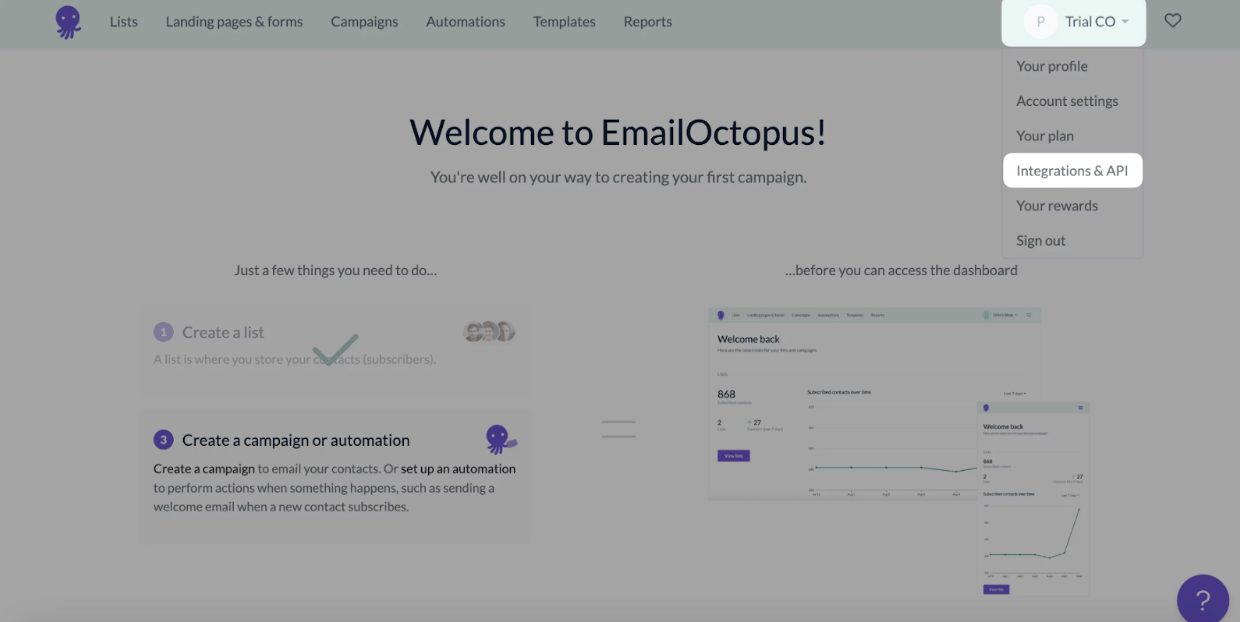
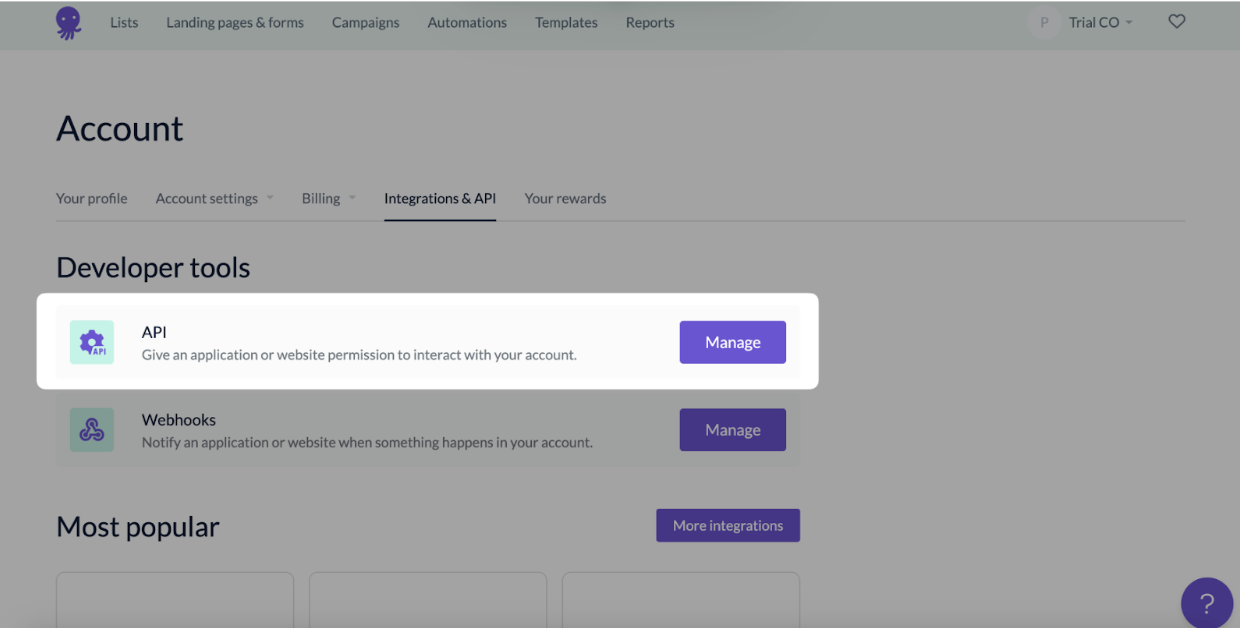
To fill in the blanks, you need to log in to your EmailOctopus account, and on the account dropdown with your company’s name, click Integrations & API. We use ‘Trial CO’ -an imaginary sample company- in this guide as our company.
-
Click Manage to have an API of EmailOctopus.
-
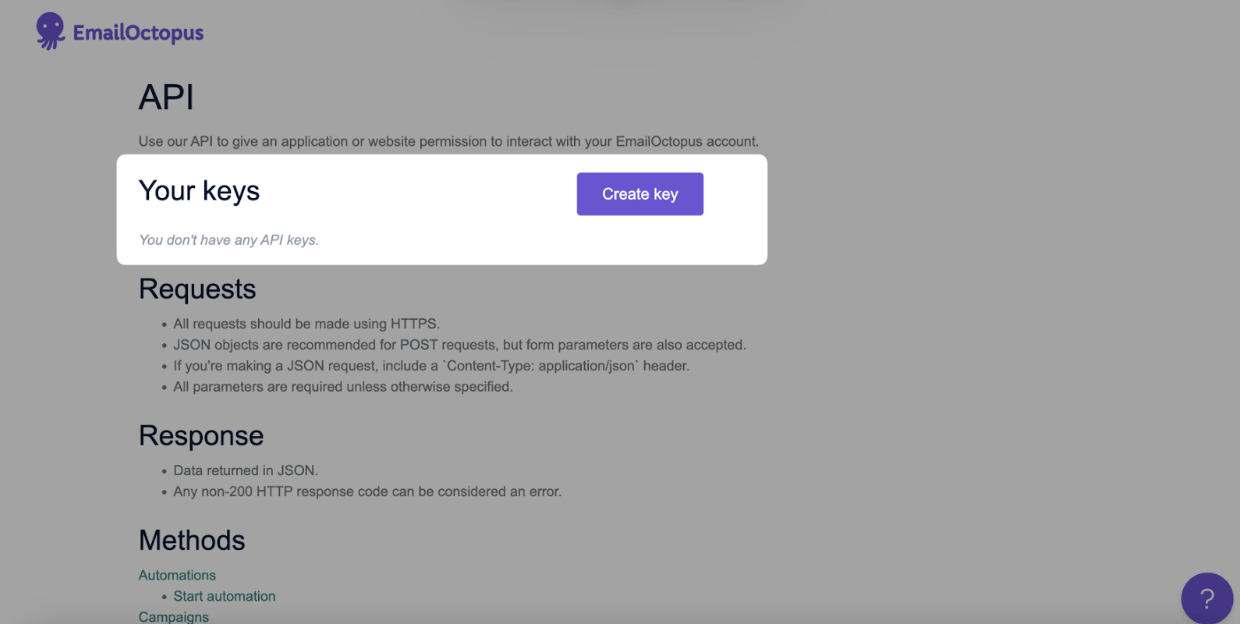
Click Create key near the ‘Your Keys’ title.
-
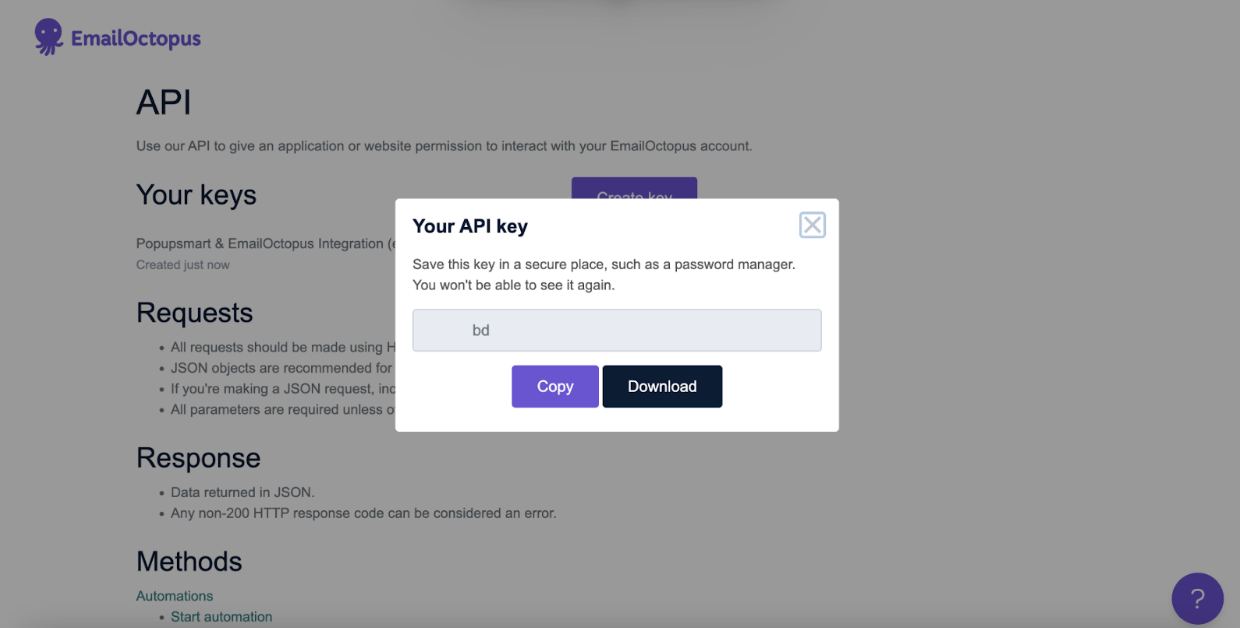
Name your API key by clicking Create and clicking Copy to copy the key for the integration.
-
Click “Save” after you name the connection and paste your API key. You need to verify your EmailOctopus account and be sure of your API Key.
-
In the Details section, you will choose the list on your EmailOctopus account.
-
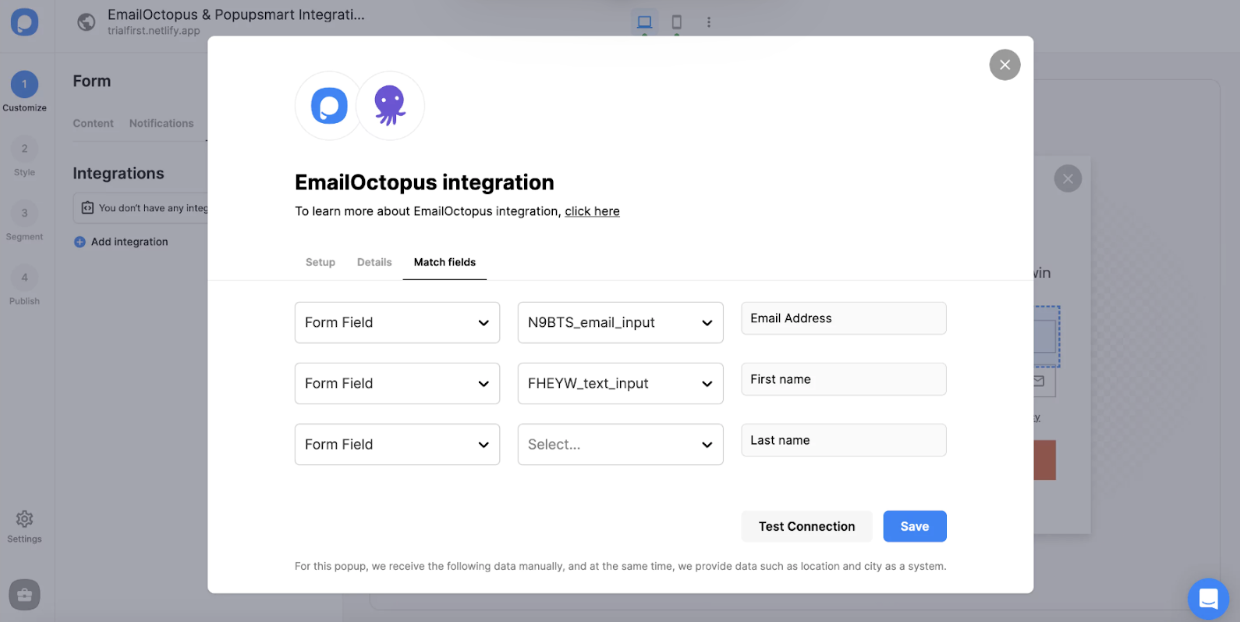
After arranging the details in the Match fields section, click “Save”. These fields may change according to the elements you include.
 Form Field: It is used if you put form elements in your popup. If you don’t use any form element, you will see ‘No options’ on the dropdown.
- System Field: You need to choose your option based on what you demand to get as data. For example, you can get the Browsers or Devices of the people who filled the popup.
- API Field: You can transfer the data you sent to Popupsmart JS API with the integration again. You can get your data from your EmailOctopus account.
- Static Field: You need to determine the specific data you want. For example, you may want to have sales or downgrades so that you can put them as ‘sales’ or ‘downgrades.’
And well done! Your integration is completed. When you complete your EmailOctopus integration, the status will be automatically on. You can change the status whenever you want from the three-dot. If you have any other questions about EmailOctopus integration, feel free to mail us!
This process took me about 10 minutes first time, and now it’s second nature. EcomStoreOwner, try it out—it’s free to start. Liz, your quiz tip aligns perfectly with Popupsmart’s gamification; ever tag devices in fields for better segmentation?