Hey people!
I’ve launched a Shopify store and I’m trying to boost conversions and grow my email list. I heard popups are a great way to do that, but I don’t want to overwhelm visitors or mess with the code too much.
I came across tools like Popupsmart, OptiMonk, and Wisepops. Does anyone here have experience using these with Shopify?
Here’s what I’m hoping to achieve:
Email capture with a nice incentive
Mobile-friendly design
Easy customization without coding
Some way to track performance
Would love a step-by-step guide or your personal experiences on how to add a popup to a Shopify store. Let’s help each other grow!
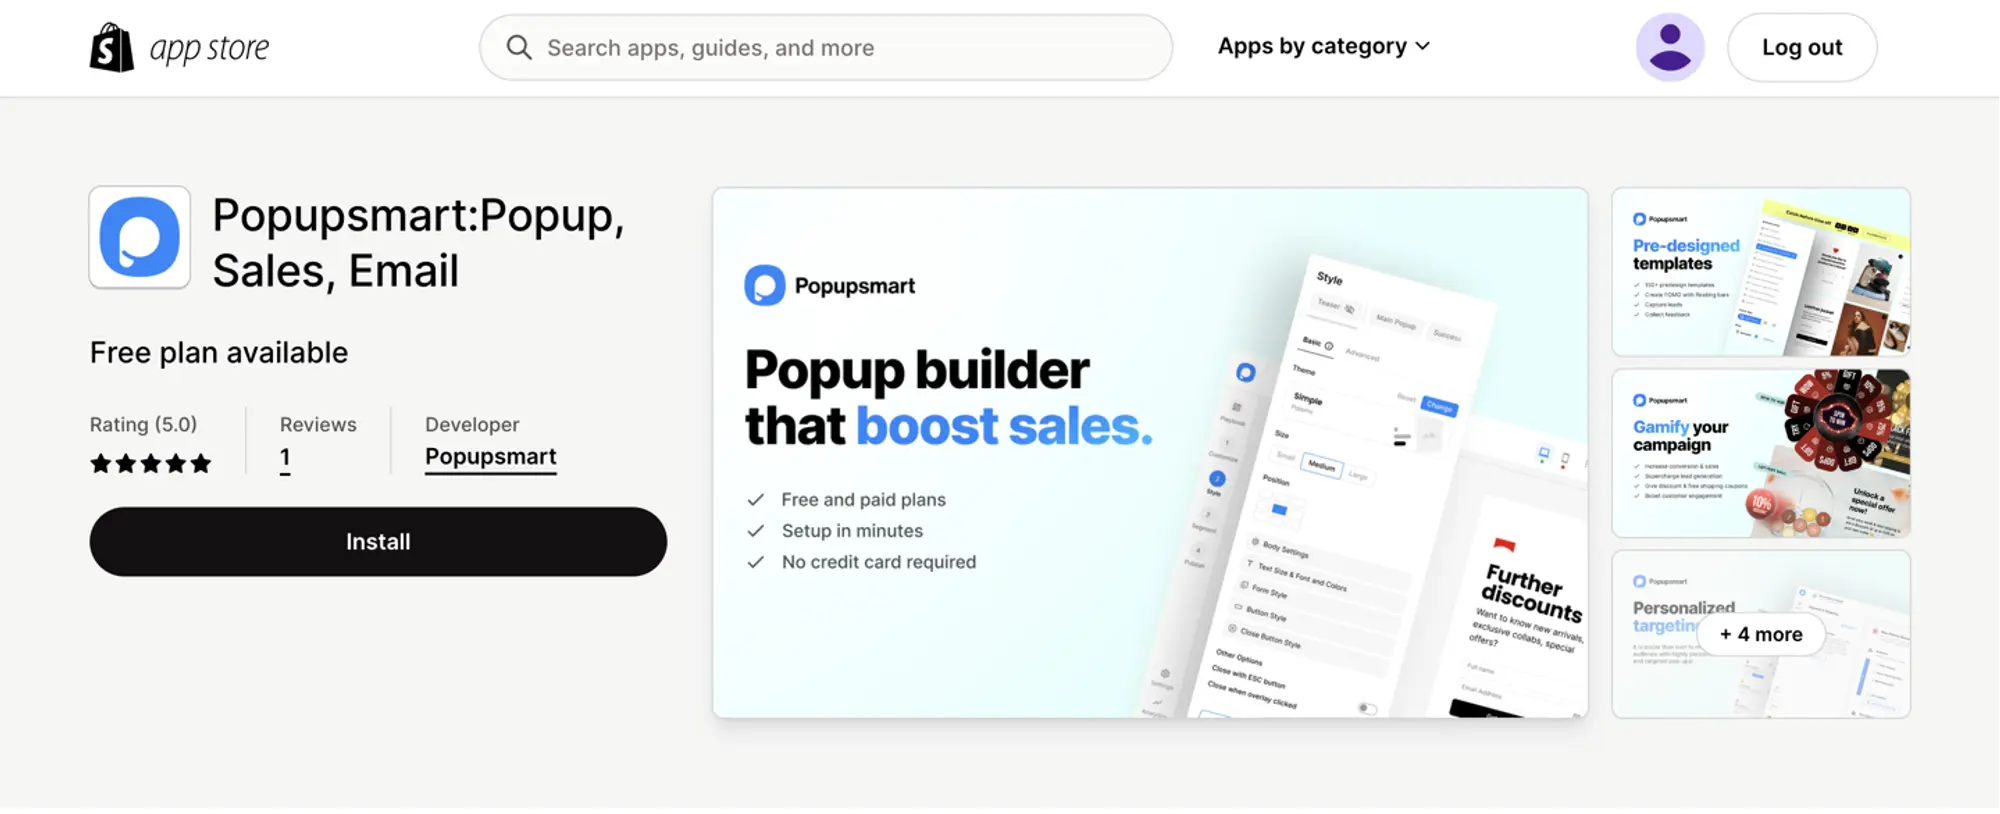
Hey Michelle! Great topic. I’ve tried all three – Popupsmart, OptiMonk, and Wisepops – while helping my sister scale her Shopify cosmetics brand. Let me walk you through Popupsmart first because it’s code-free, lightweight, and doesn’t slow down the store.
Step-by-Step: How to Add a Shopify Popup with Popupsmart
Integrating Popupsmart with a Shopify store is a breeze, offering two straightforward methods to seamlessly incorporate its functionality. Firstly, you can effortlessly integrate Popupsmart with your Shopify store by utilizing Popupsmart’s Shopify app, which streamlines the process with intuitive steps, ensuring a hassle-free setup.
Alternatively, for those preferring a direct approach, Popupsmart offers a simple embed code integration method, allowing you to embed the popup functionality directly into your Shopify store’s theme. Whether opting for the app or code integration, Popupsmart ensures simplicity and efficiency in enhancing your Shopify store’s engagement and conversion rates.
Let’s see how you can create a Shopify popup in 2 ways:
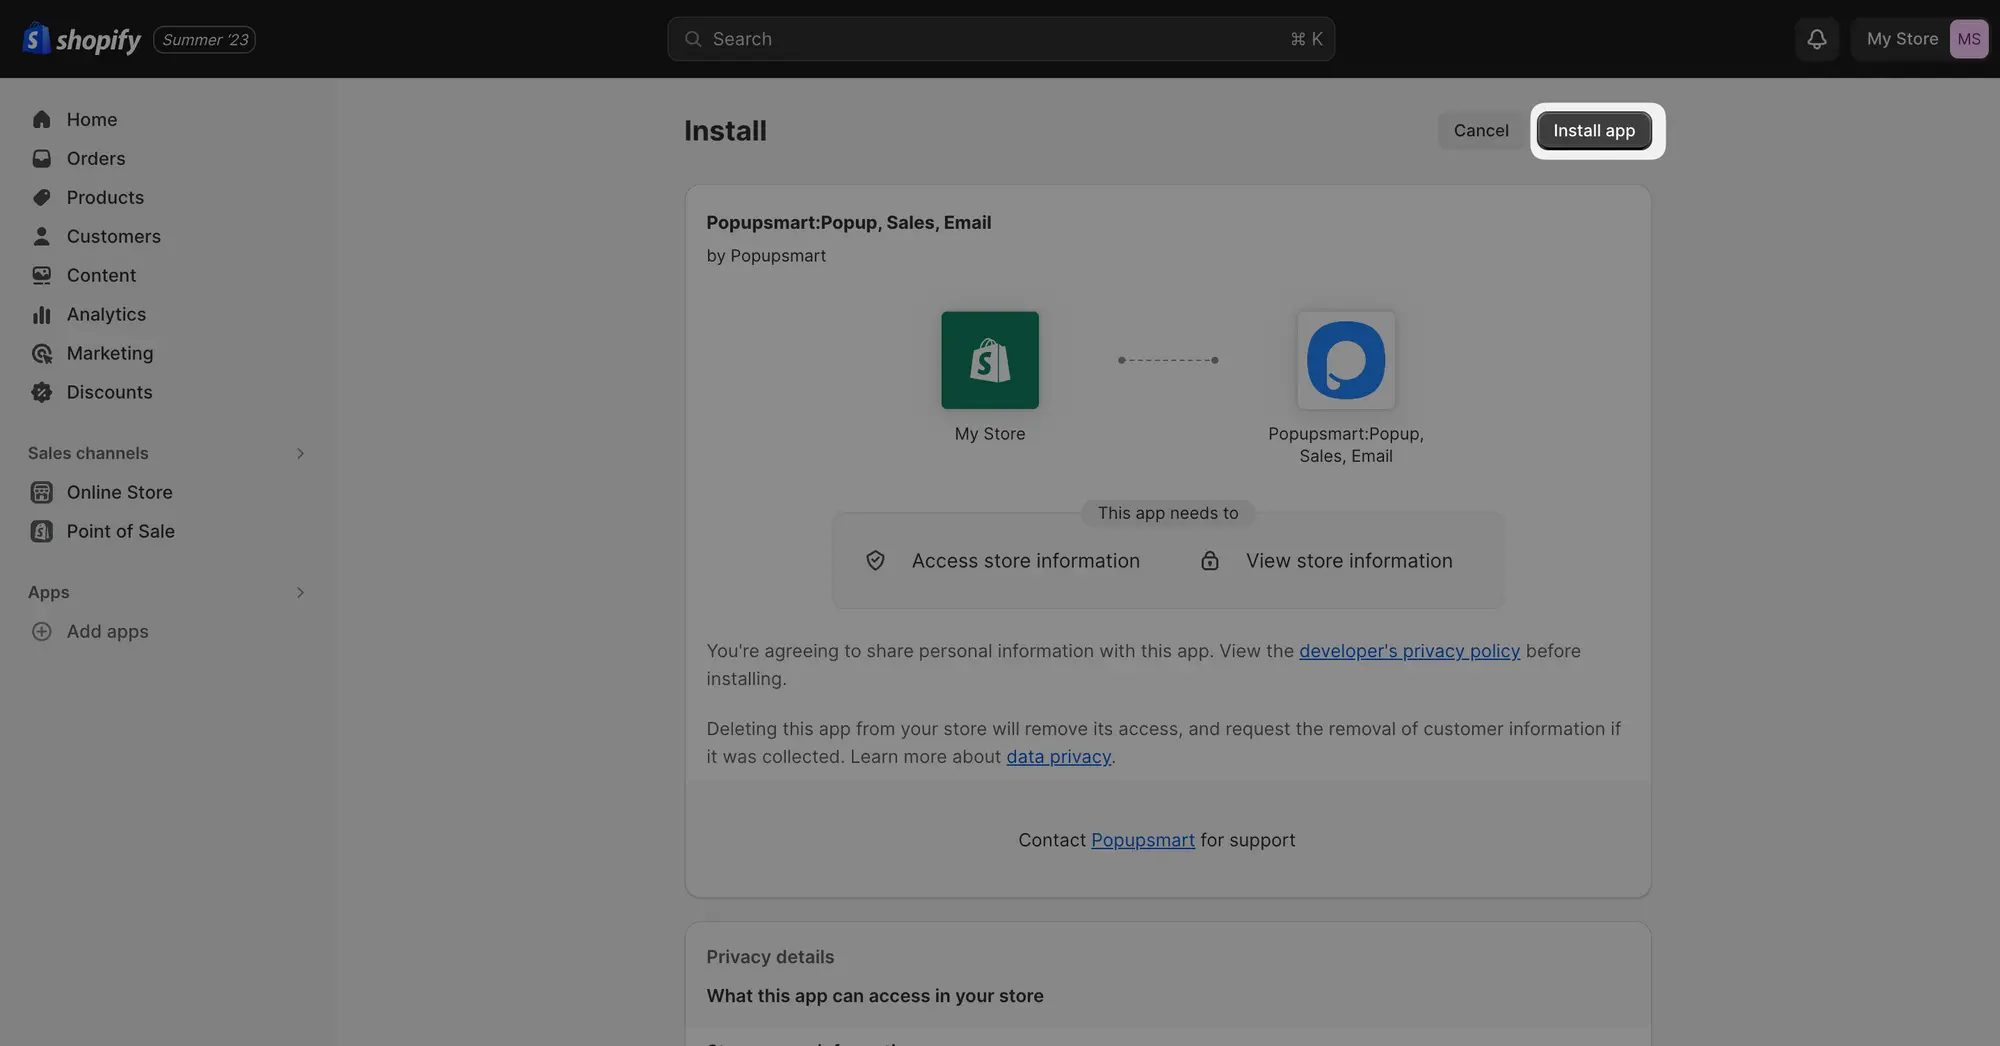
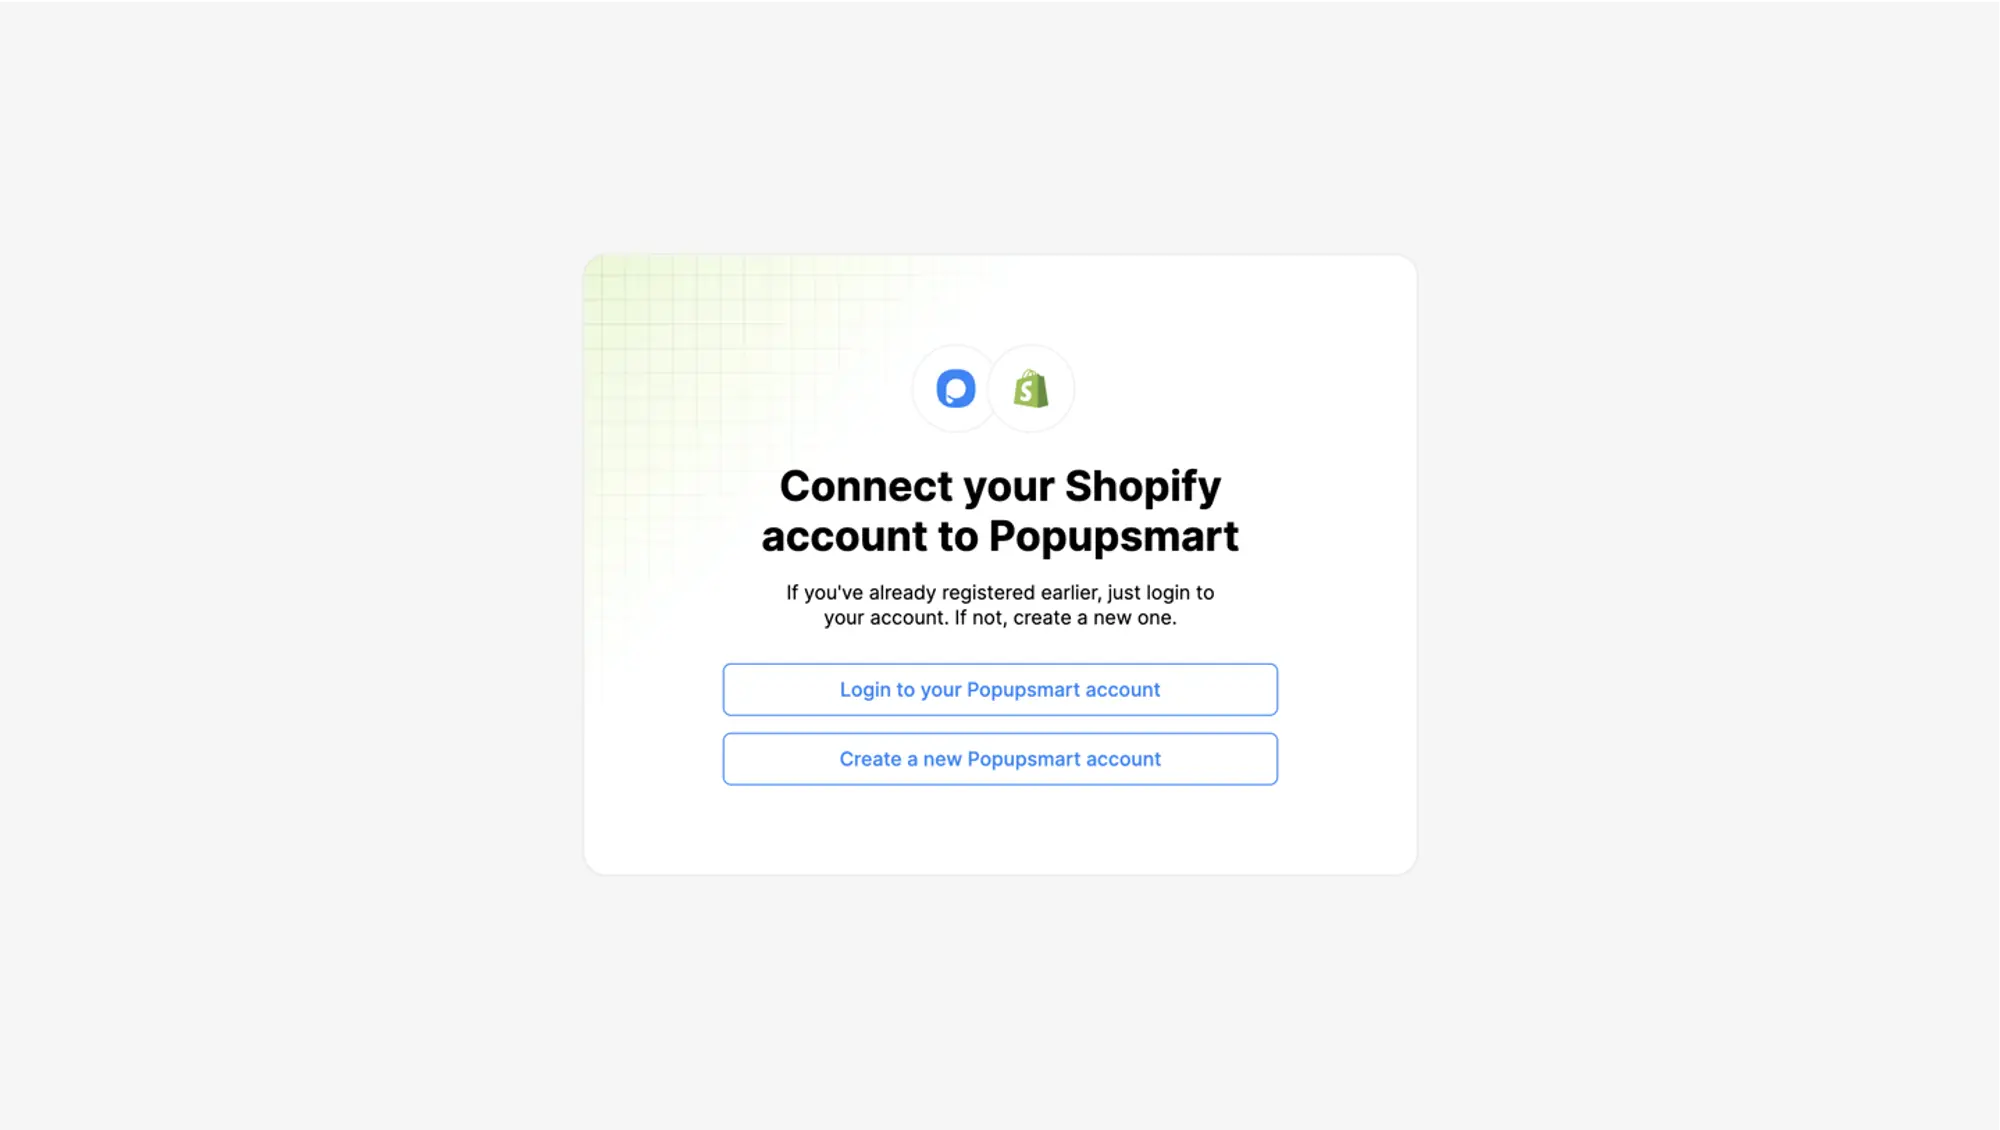
3. After installation, you’ll be redirected to Popupsmart’s interface. You can either create a new Popupsmart account or add your Shopify Store to an existing account by clicking “Login to your Popupsmart account”.
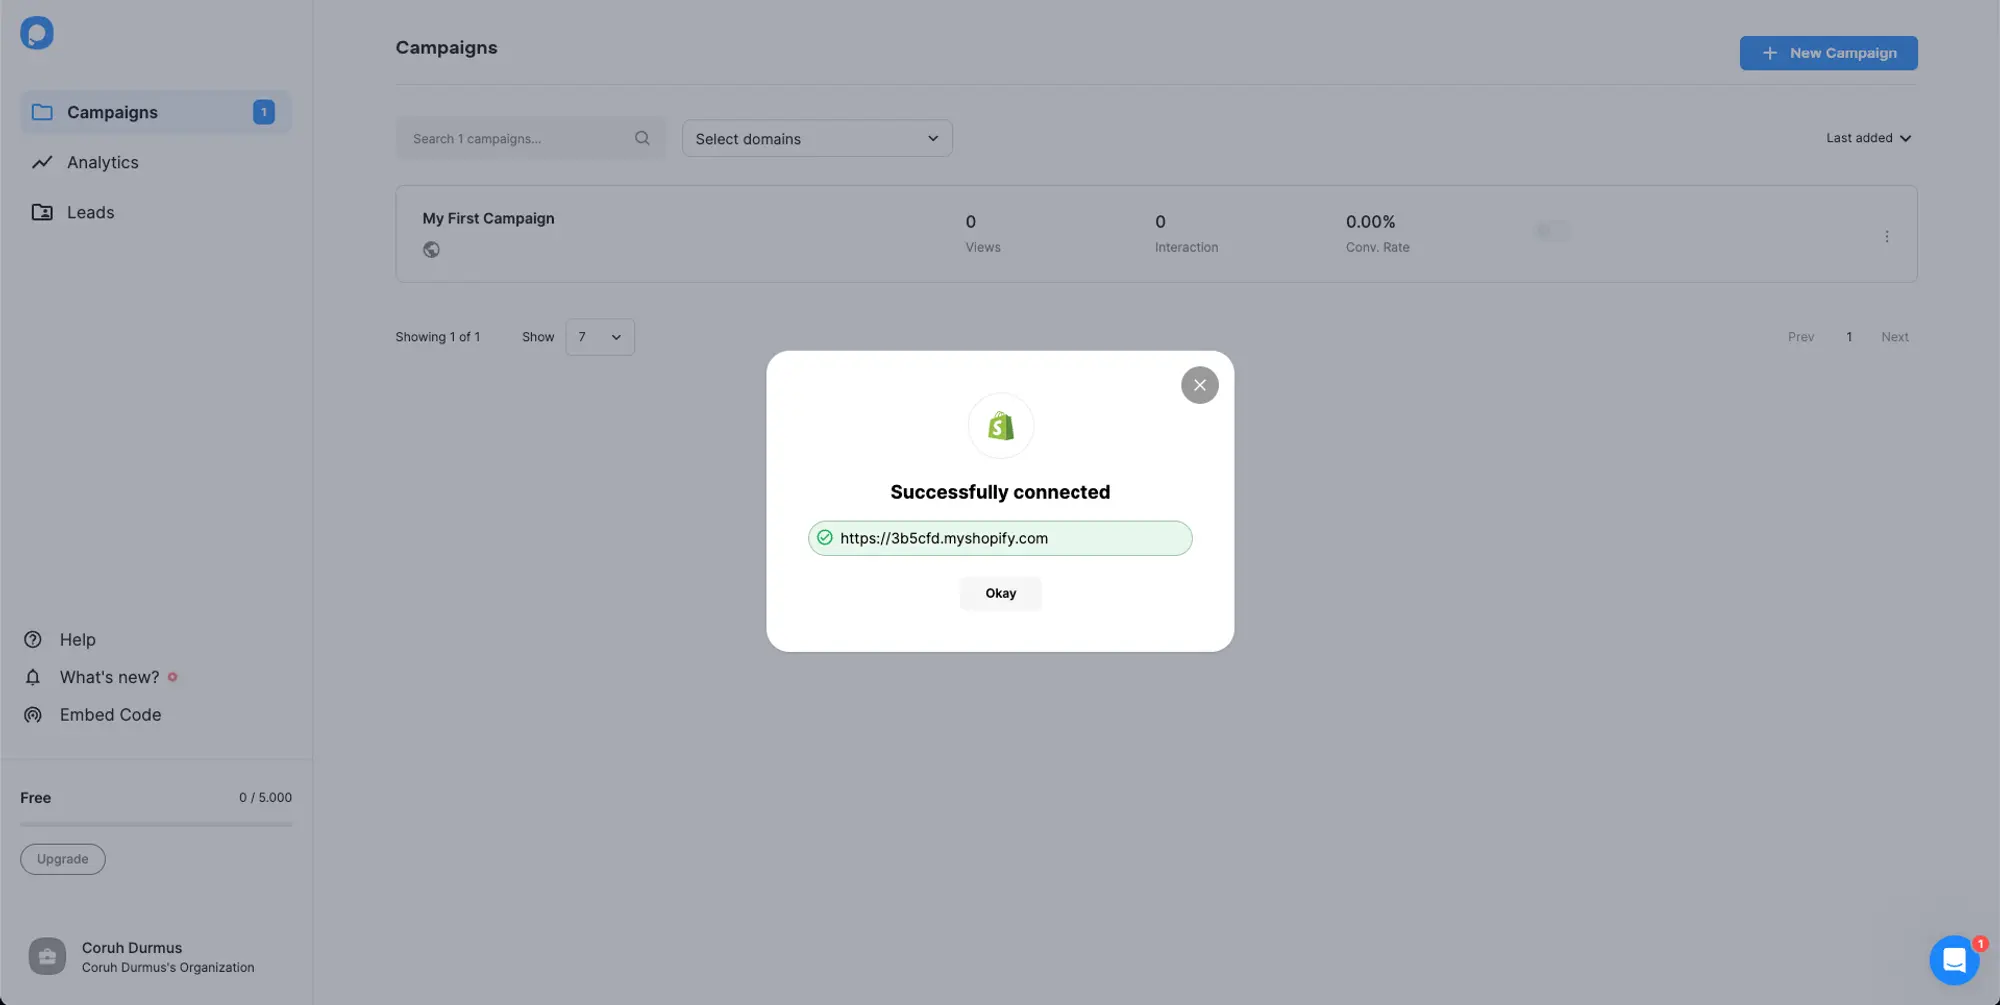
4. Upon creating a new Popupsmart account, your credentials and store will automatically be authenticated. You will then see the following confirmation message.
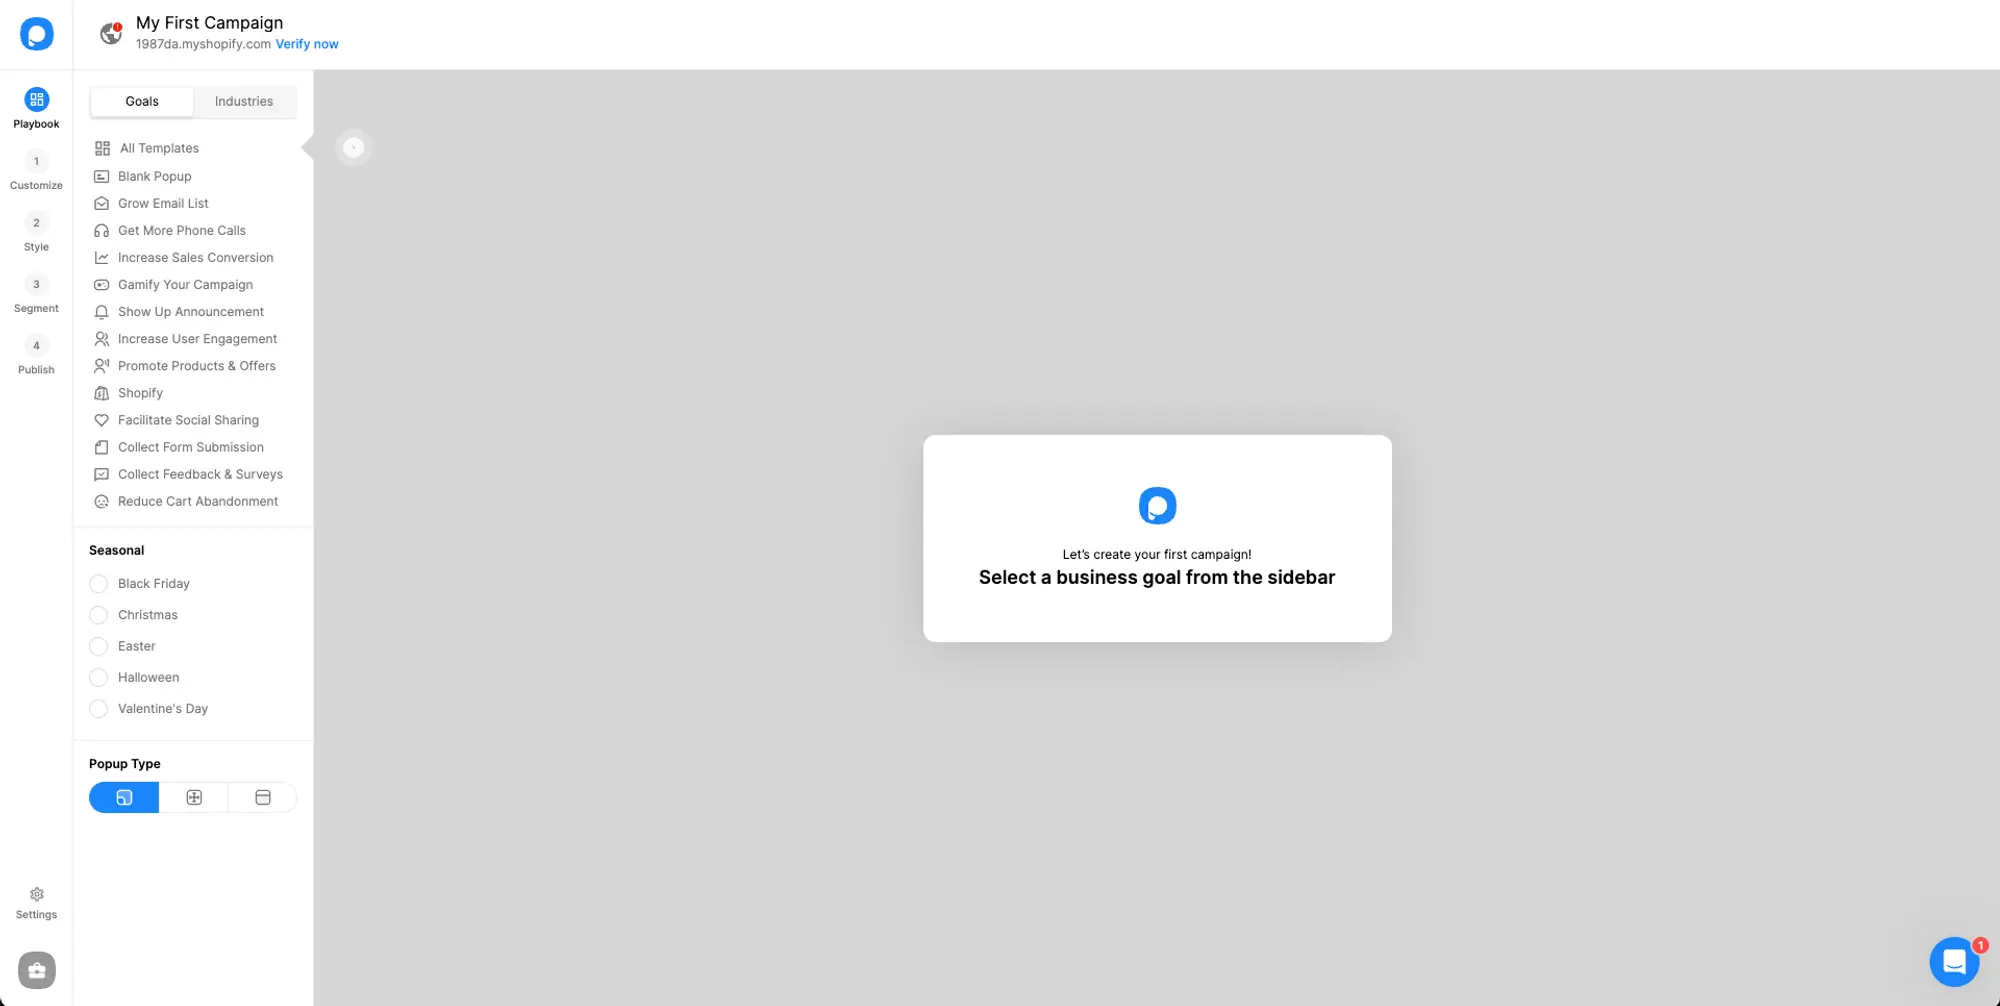
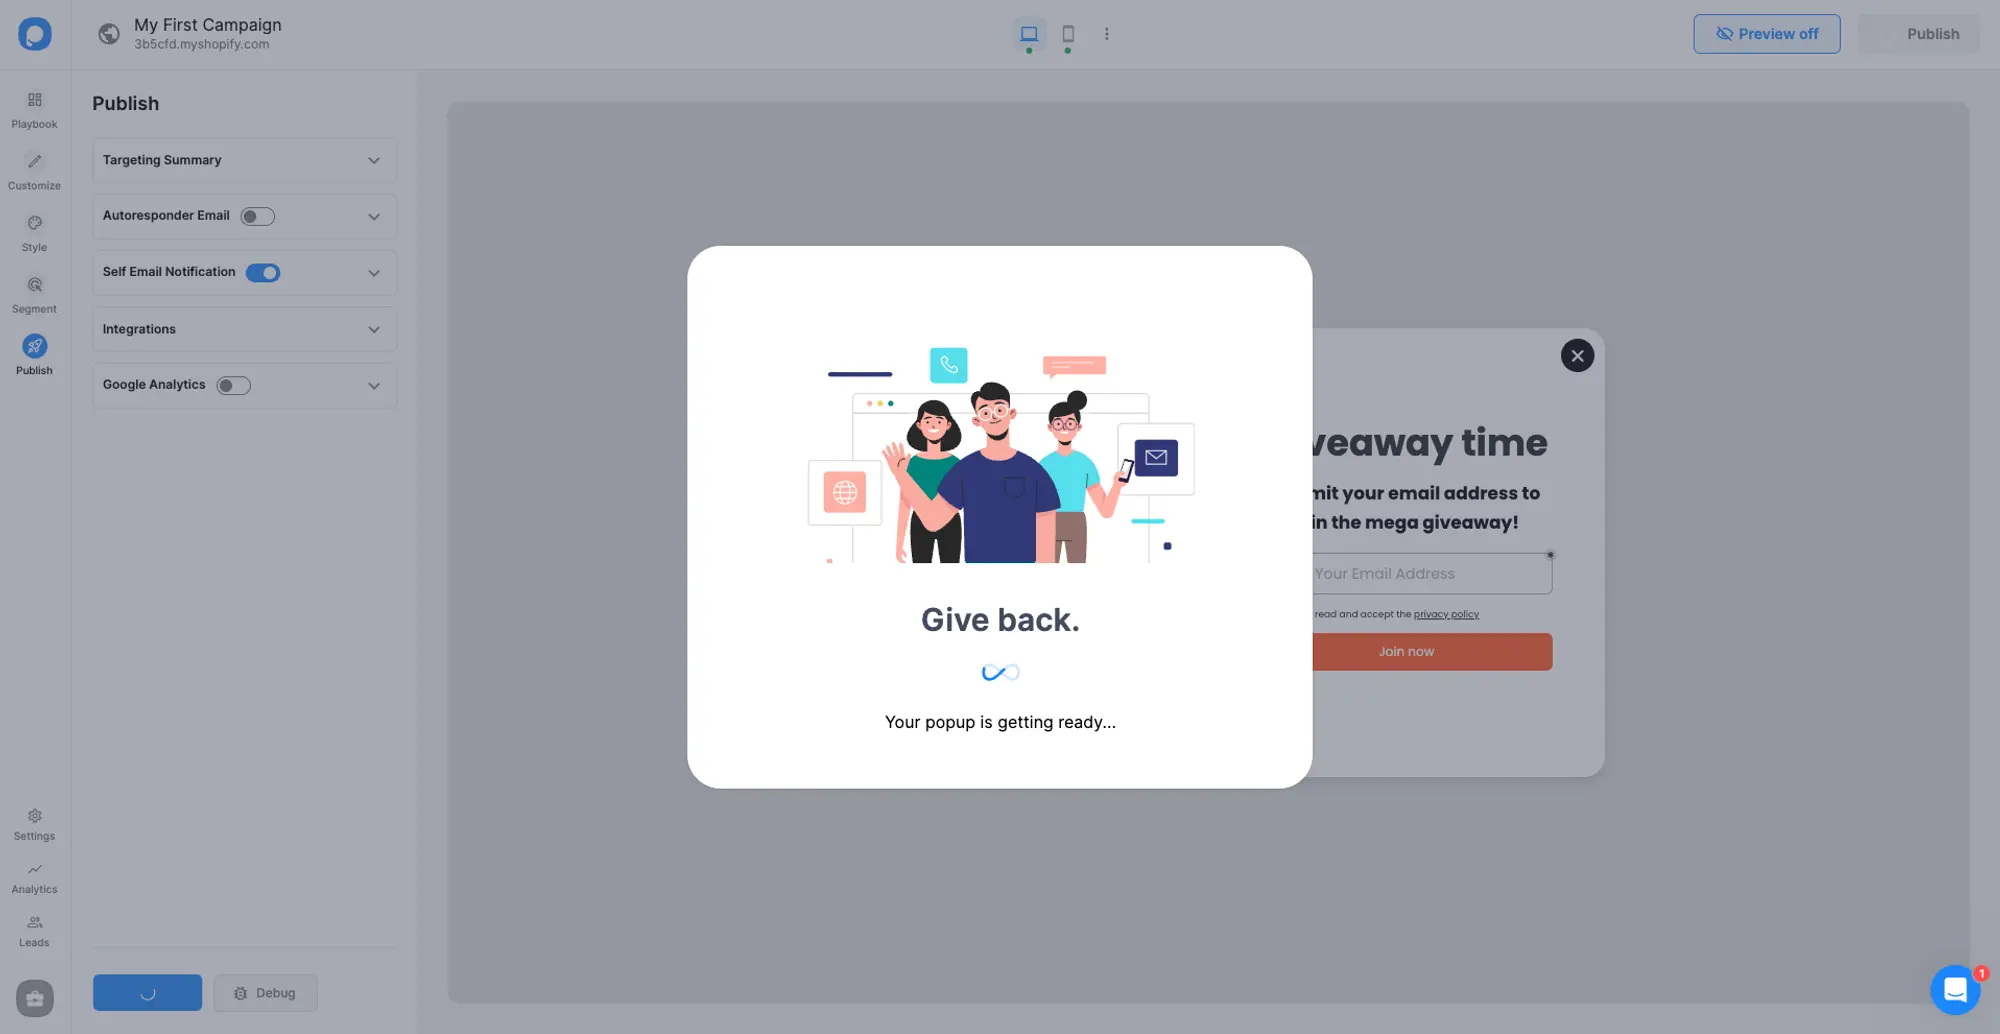
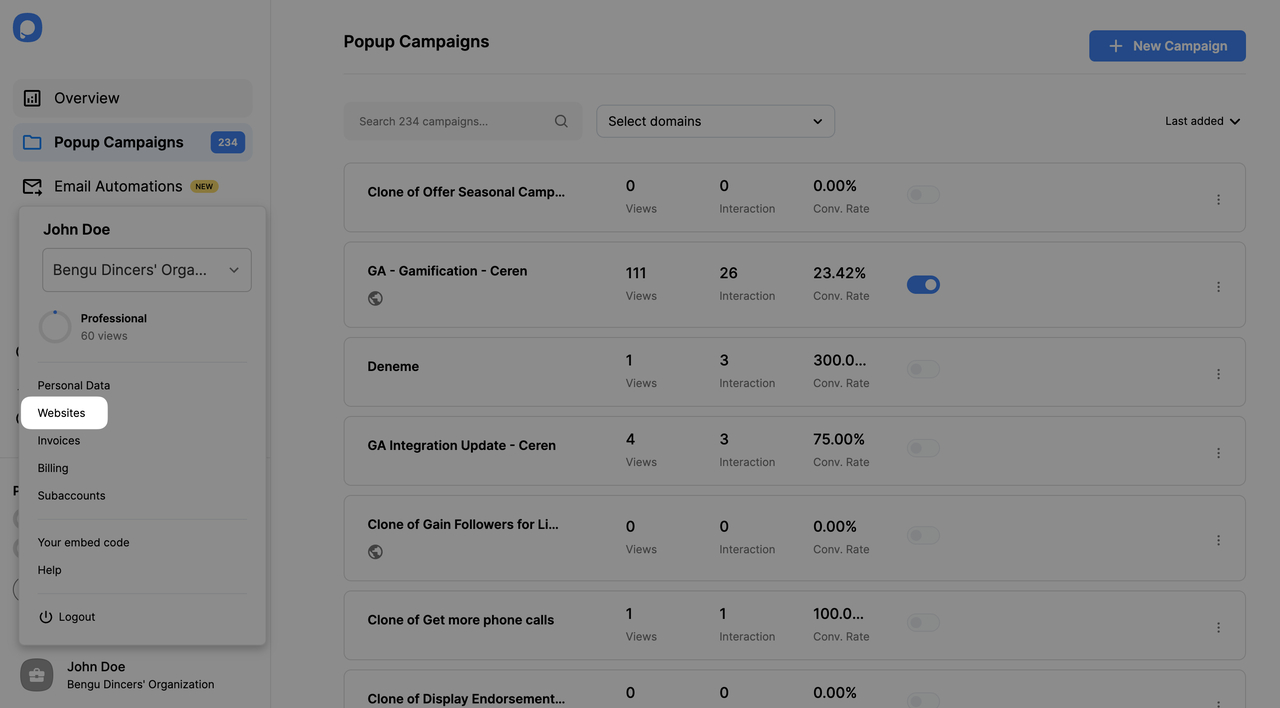
5. After confirmation, you’ll be taken to the first step of creating your first popup campaign. Choose a template goal from the left-hand menu to begin.
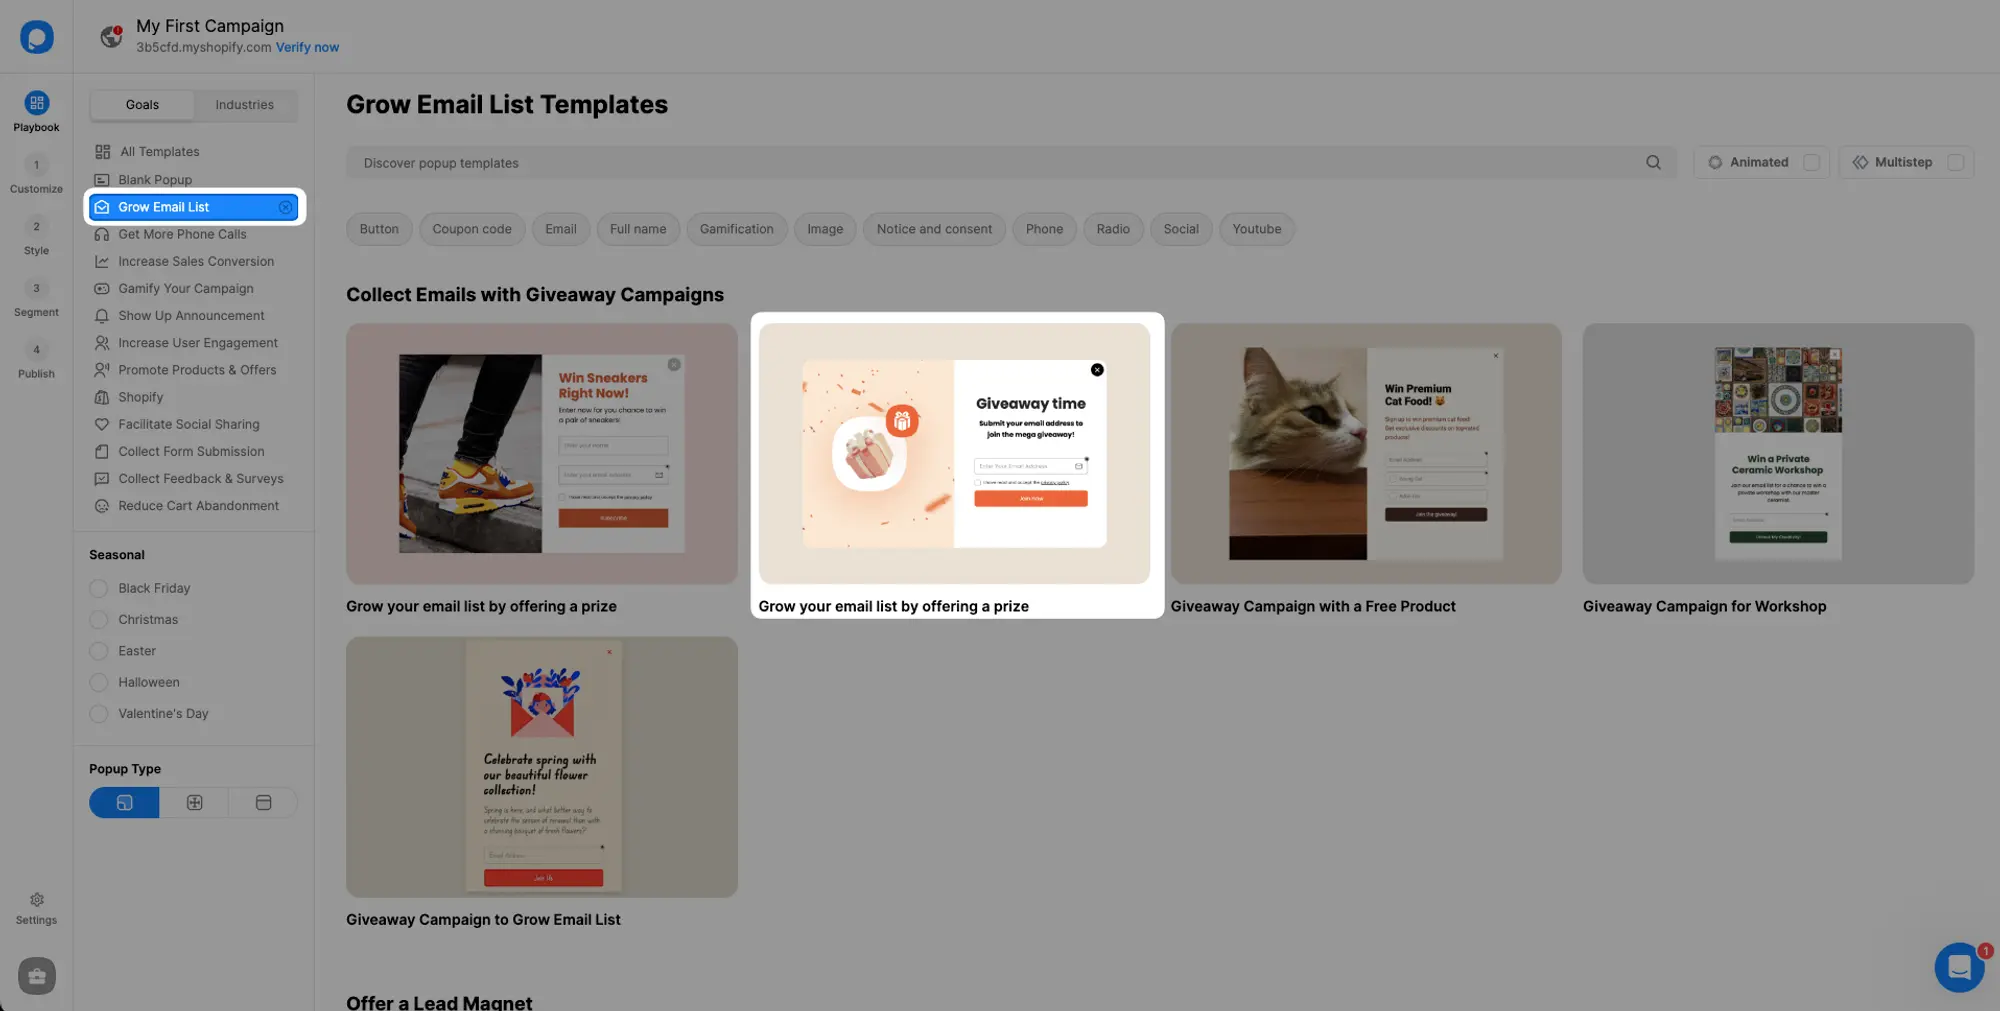
6. Let’s create a popup campaign in order to collect emails. Select “Grow Email List” from the left-hand menu as your filter. Then choose a template that you like.
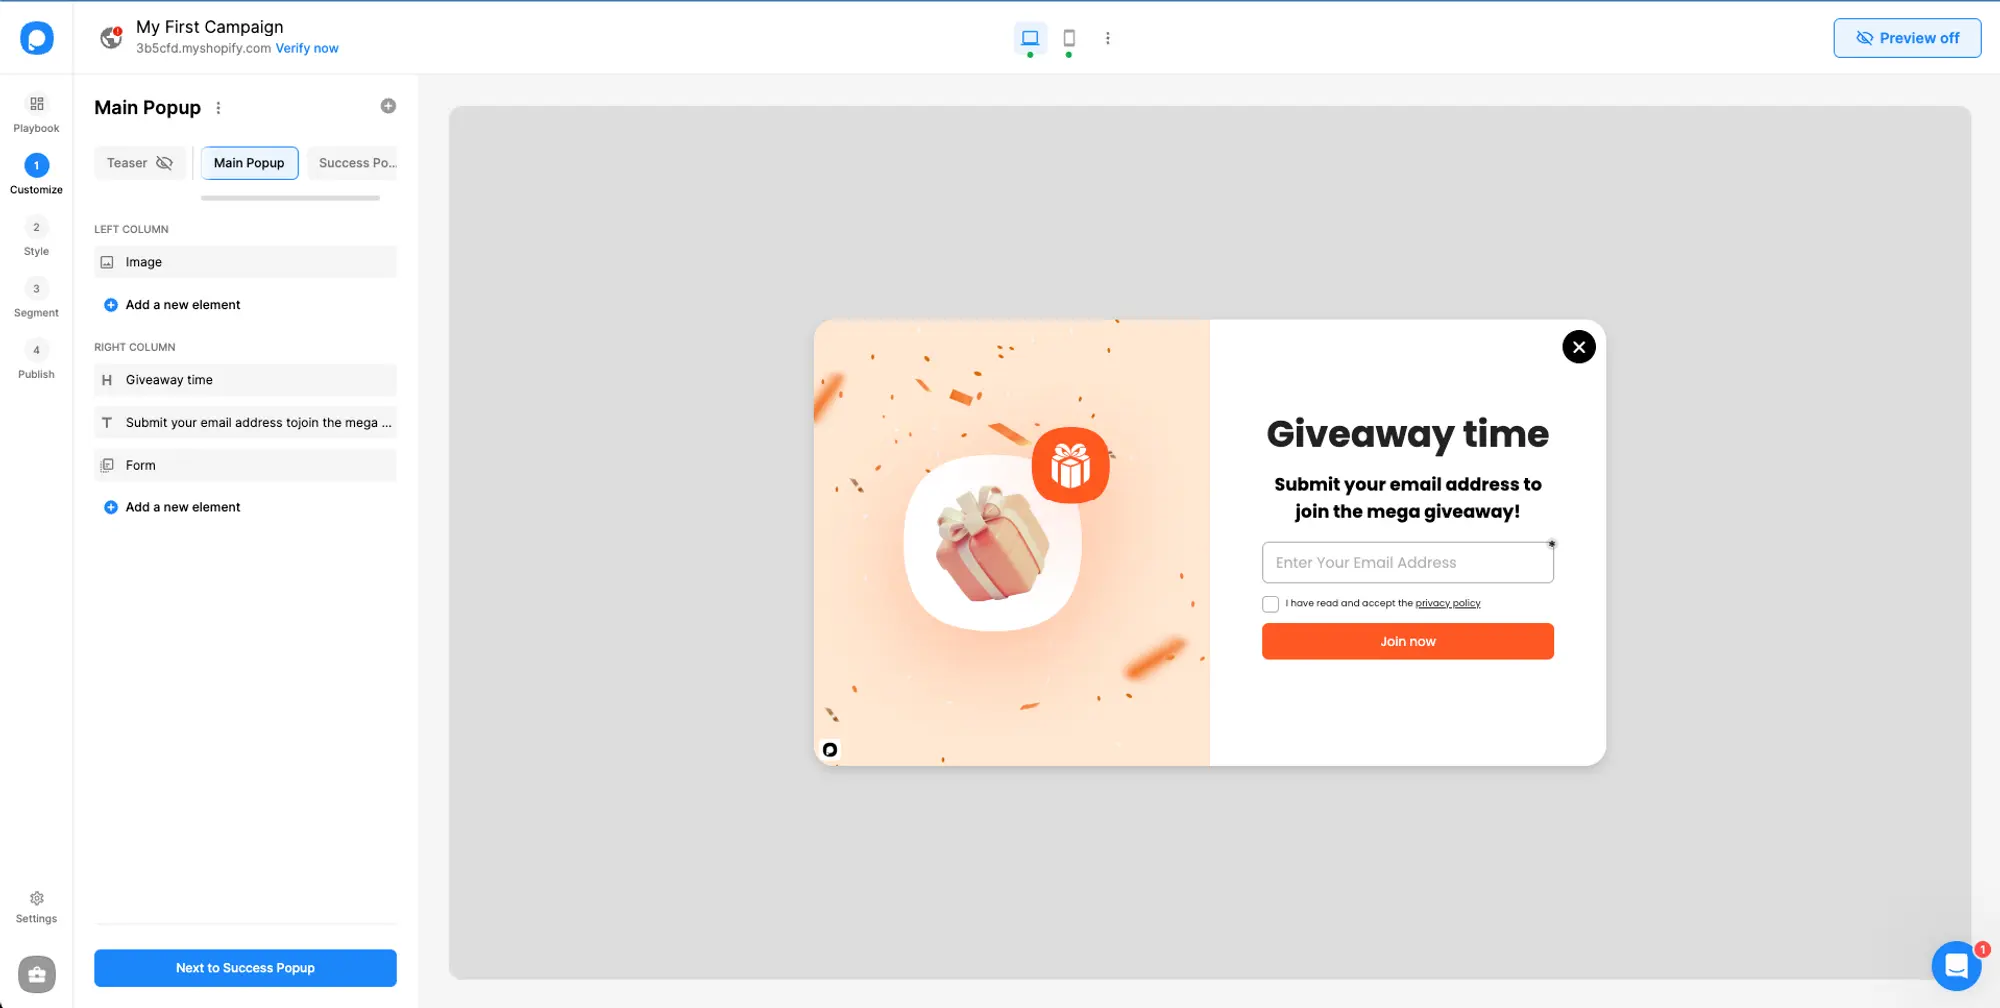
7. In the Customize Step tailor your popup according to your needs. You can also adjust its style in the Style Step and create personalized Segments & Targeting to display the popup to specific users.
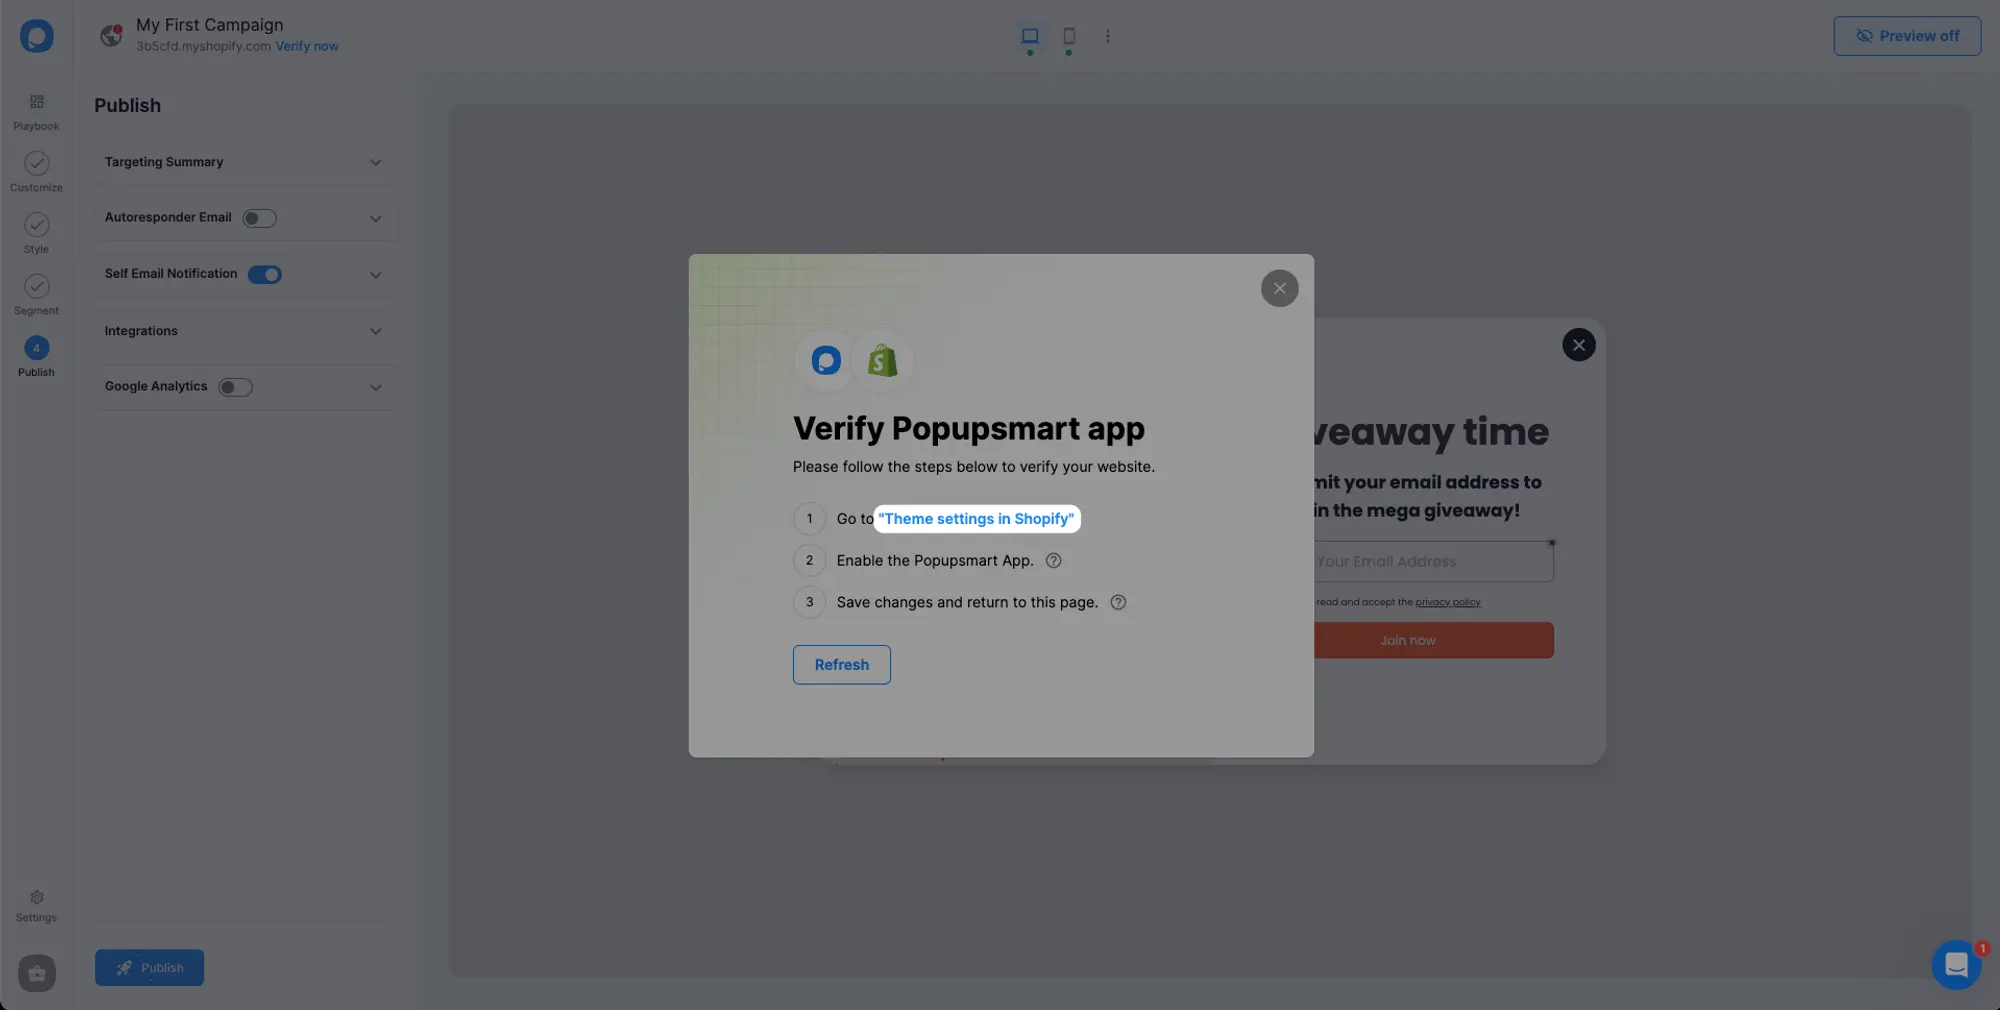
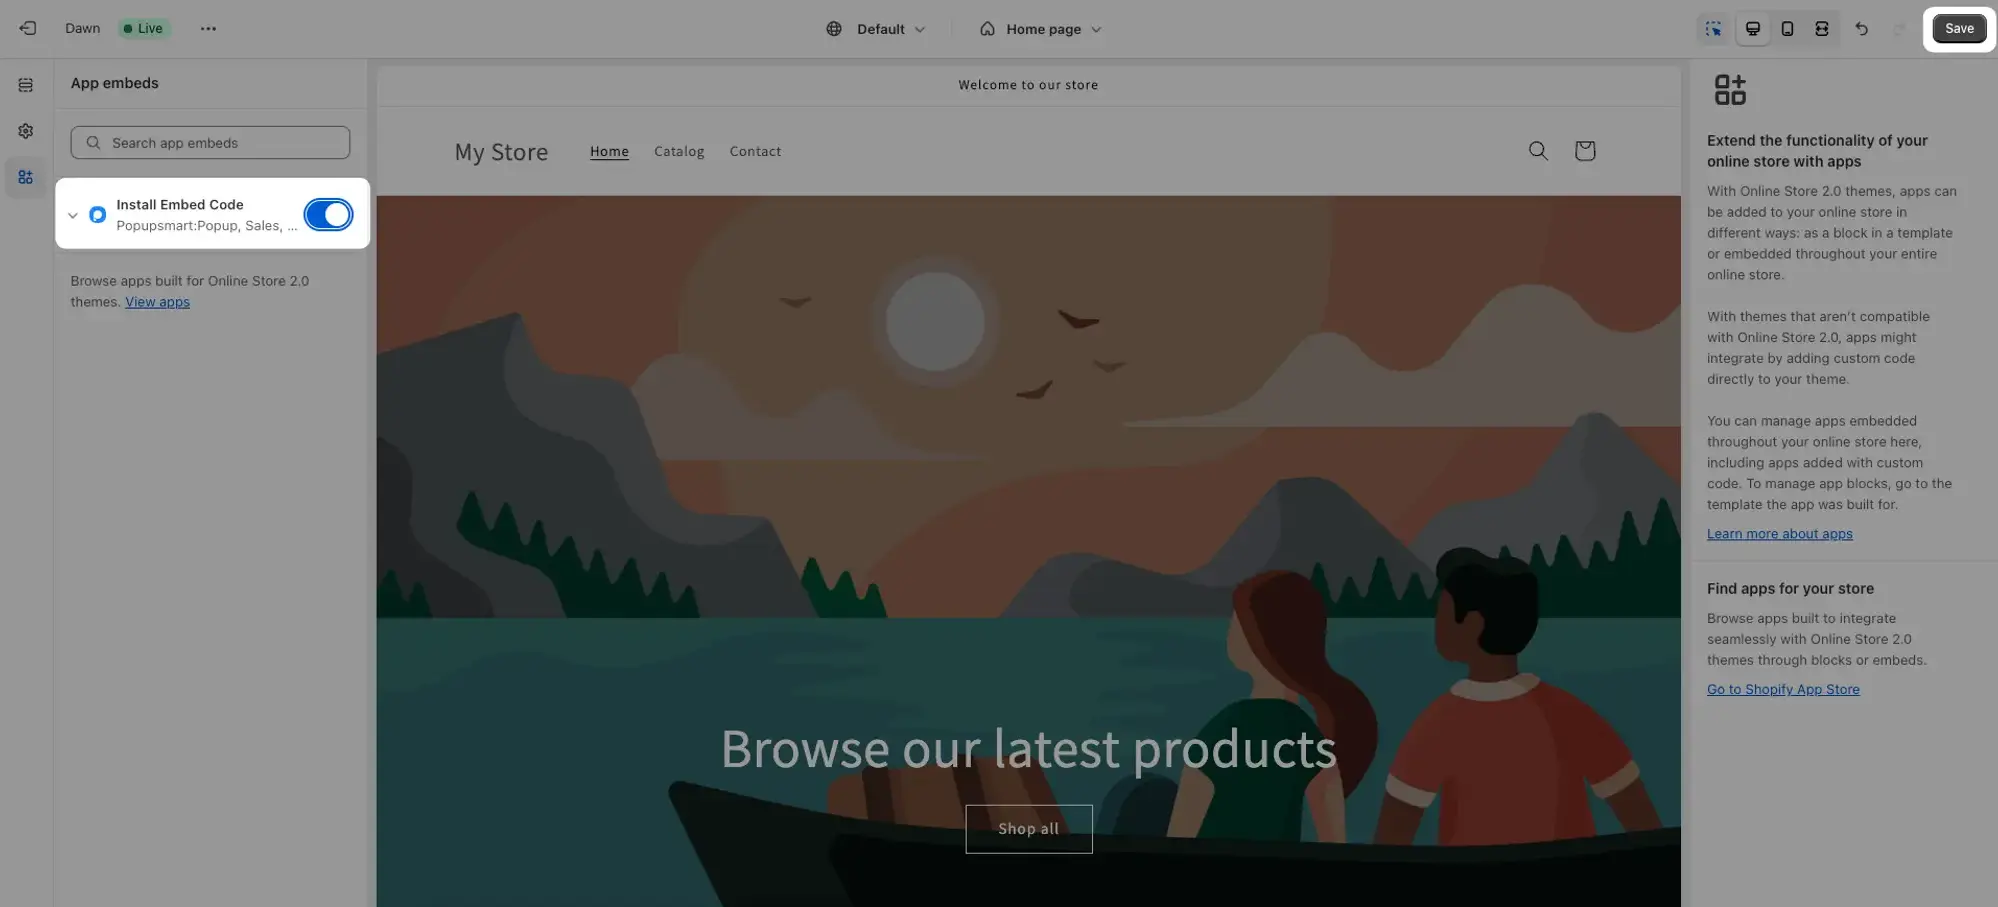
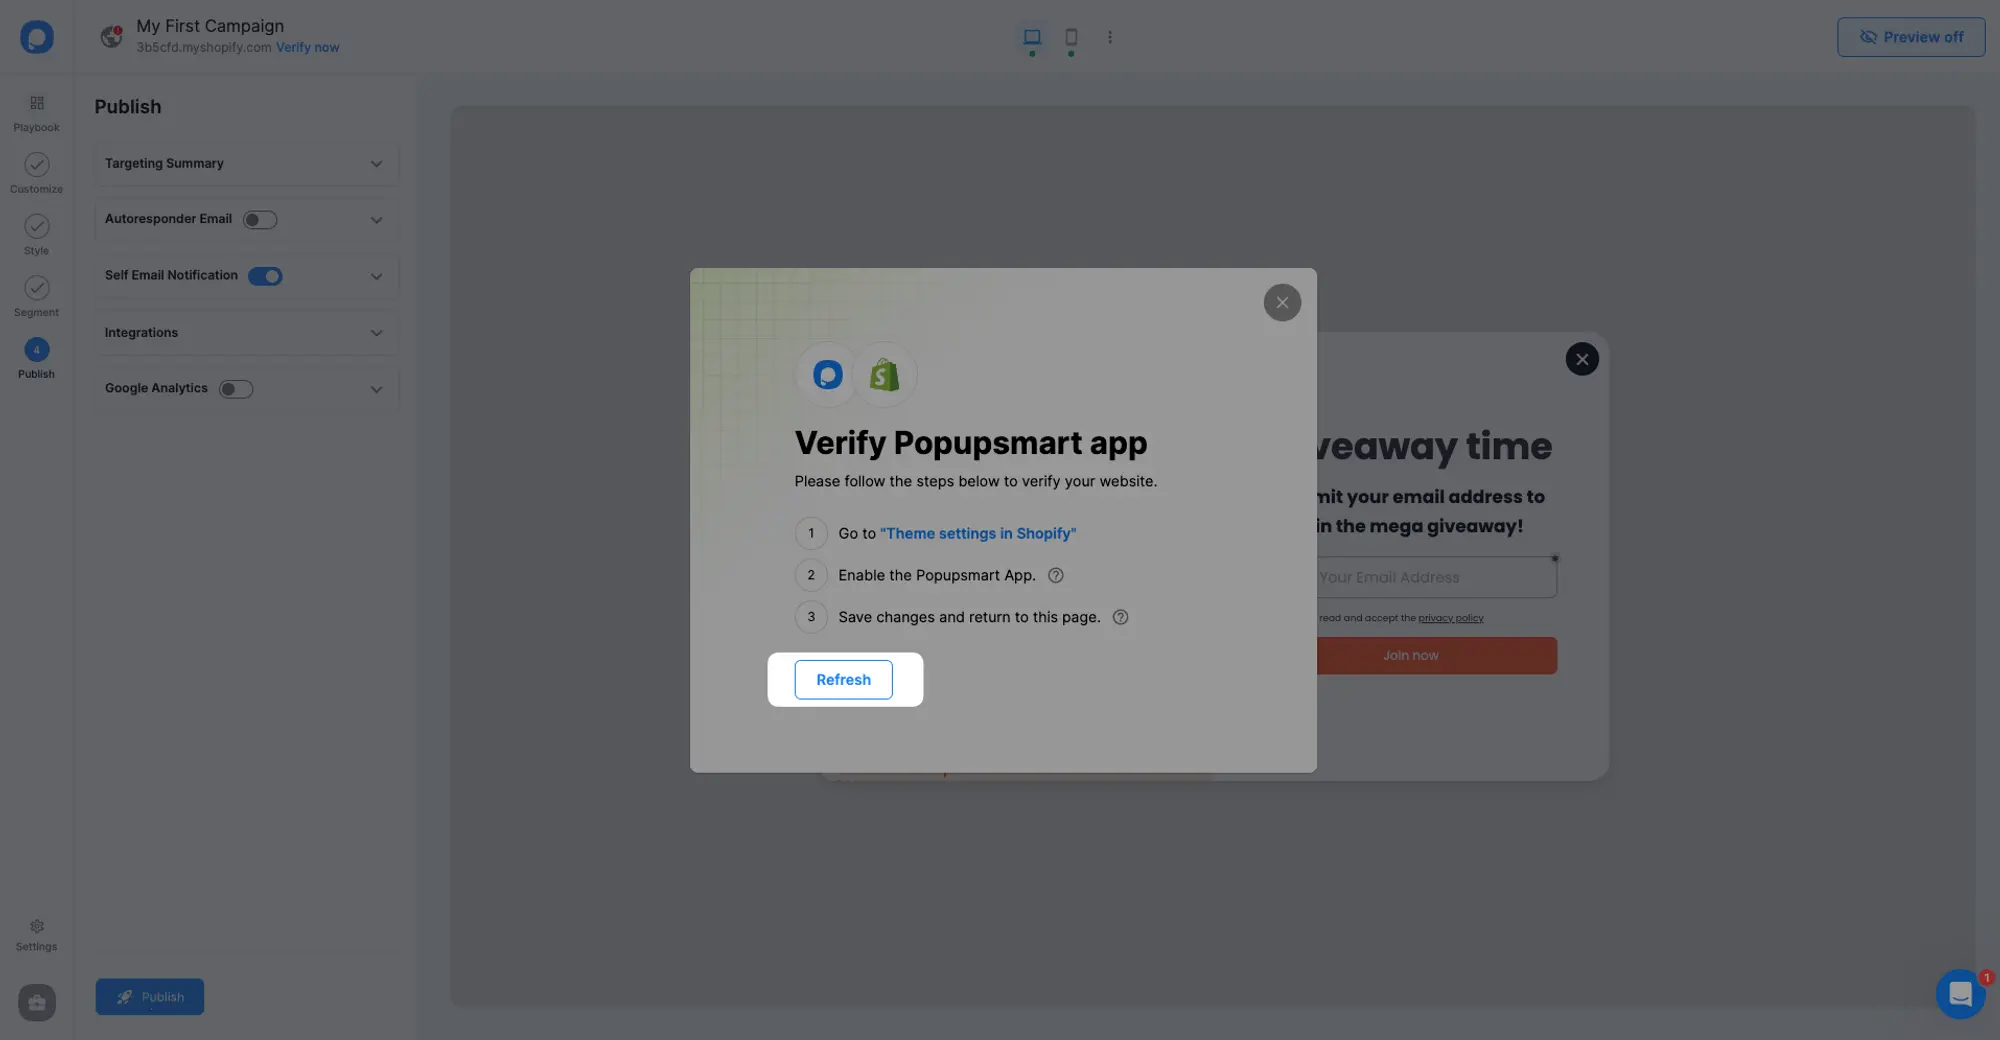
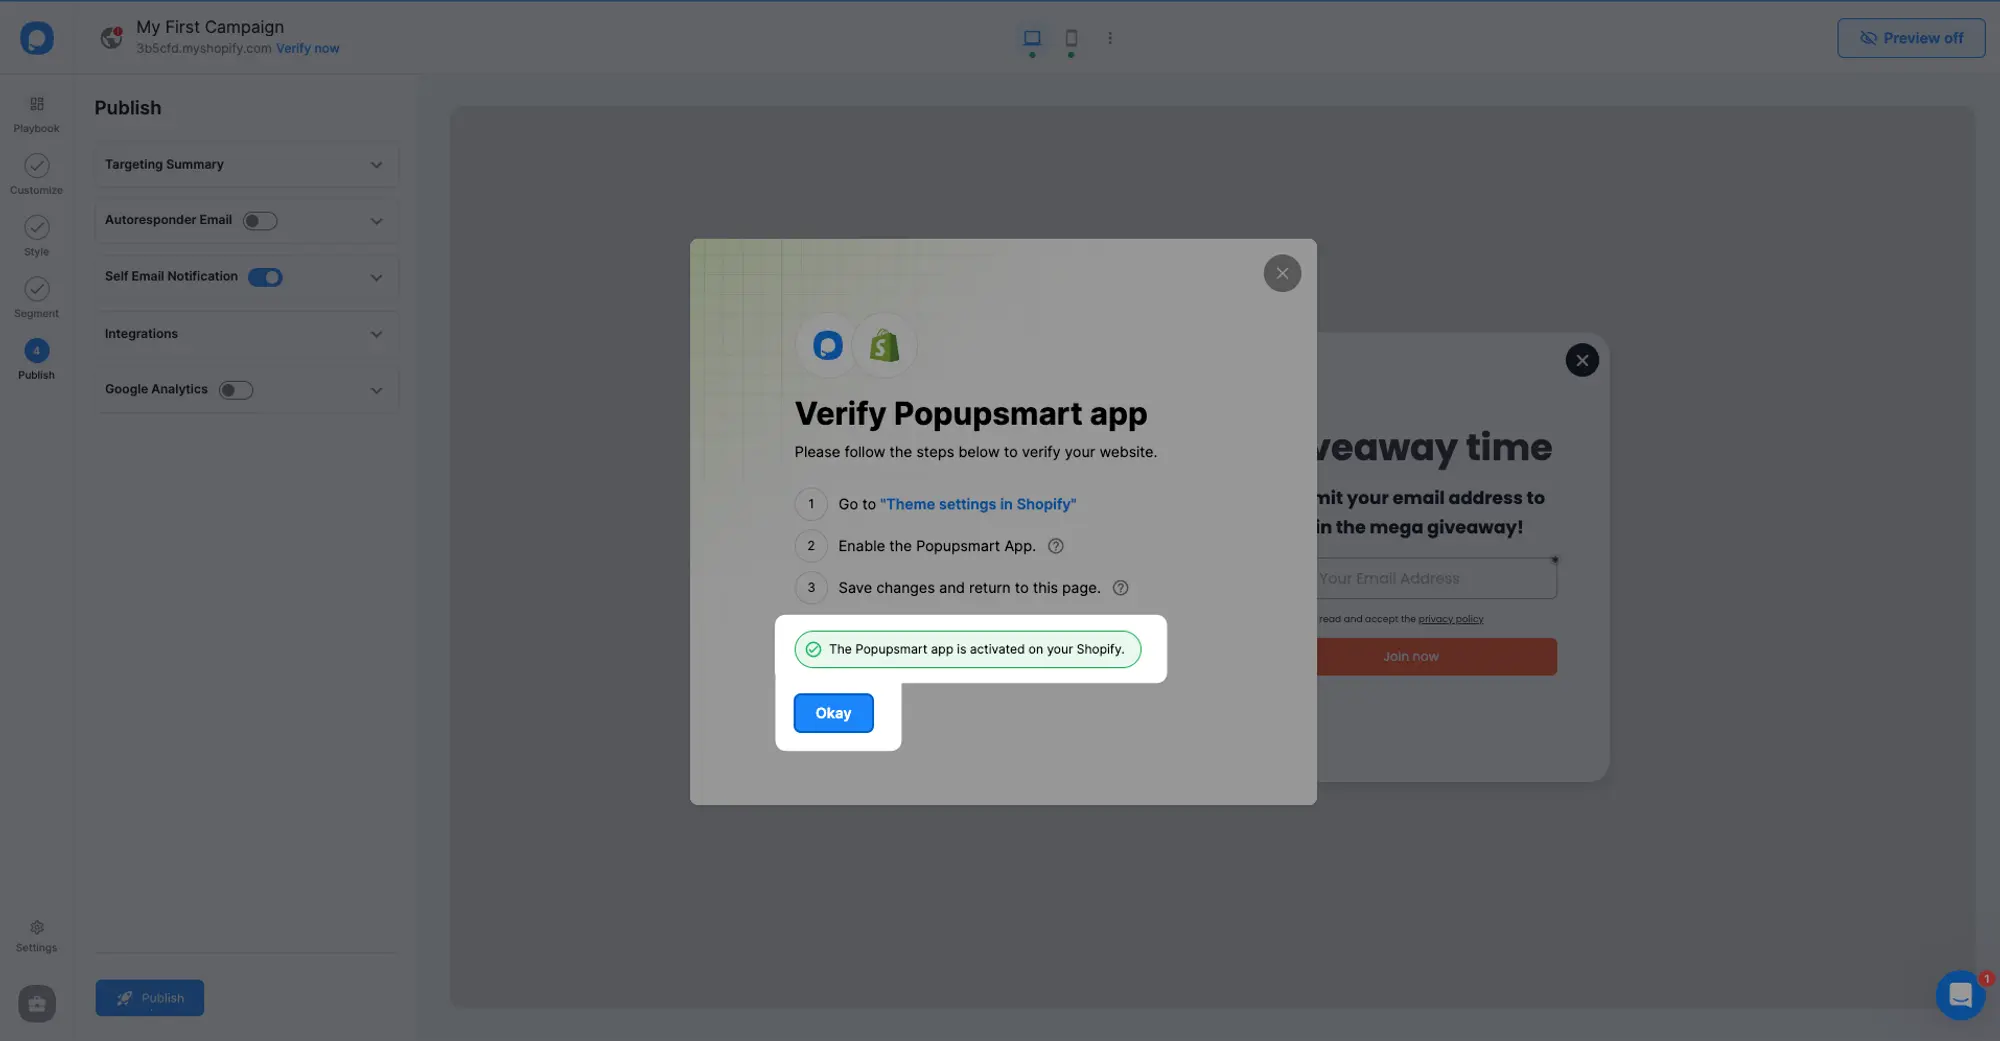
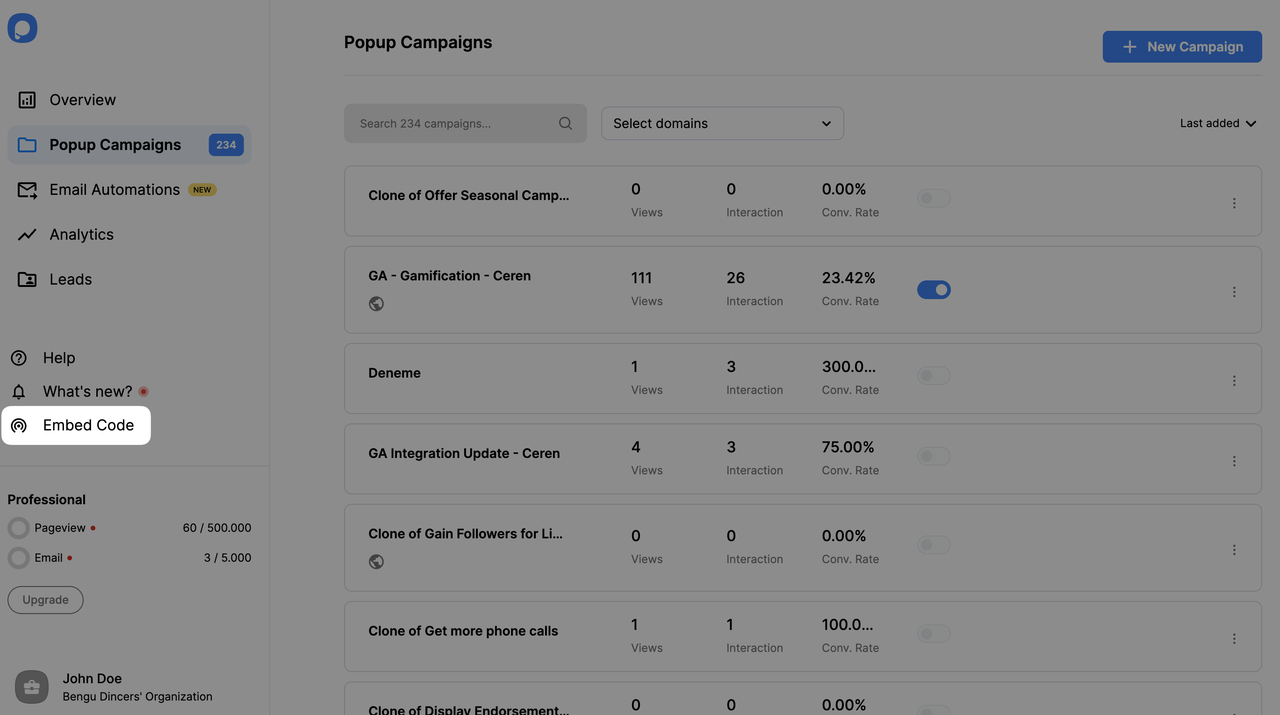
9. If Popupsmart is not enabled in your Shopify Theme editor, you will see a modal that says “Verify Popupsmart App”. If this modal appears, click “Theme settings in Shopify” to be redirected to your theme in the Shopify theme editor.
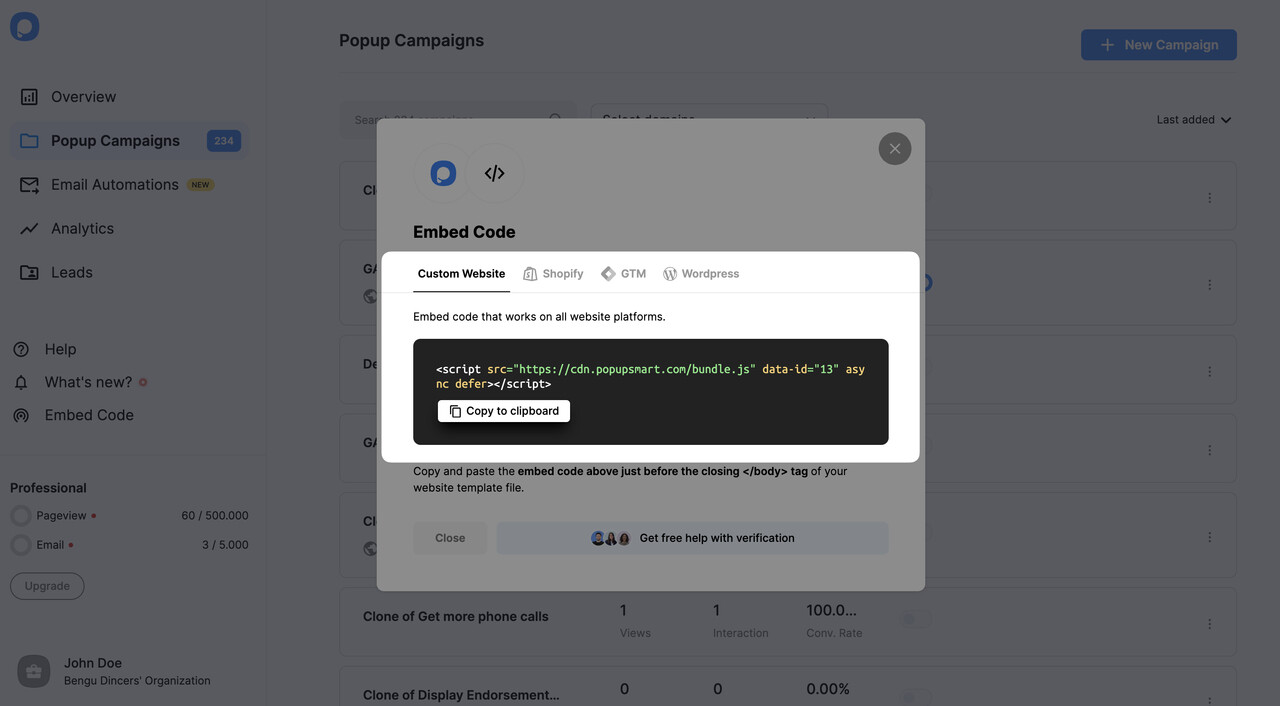
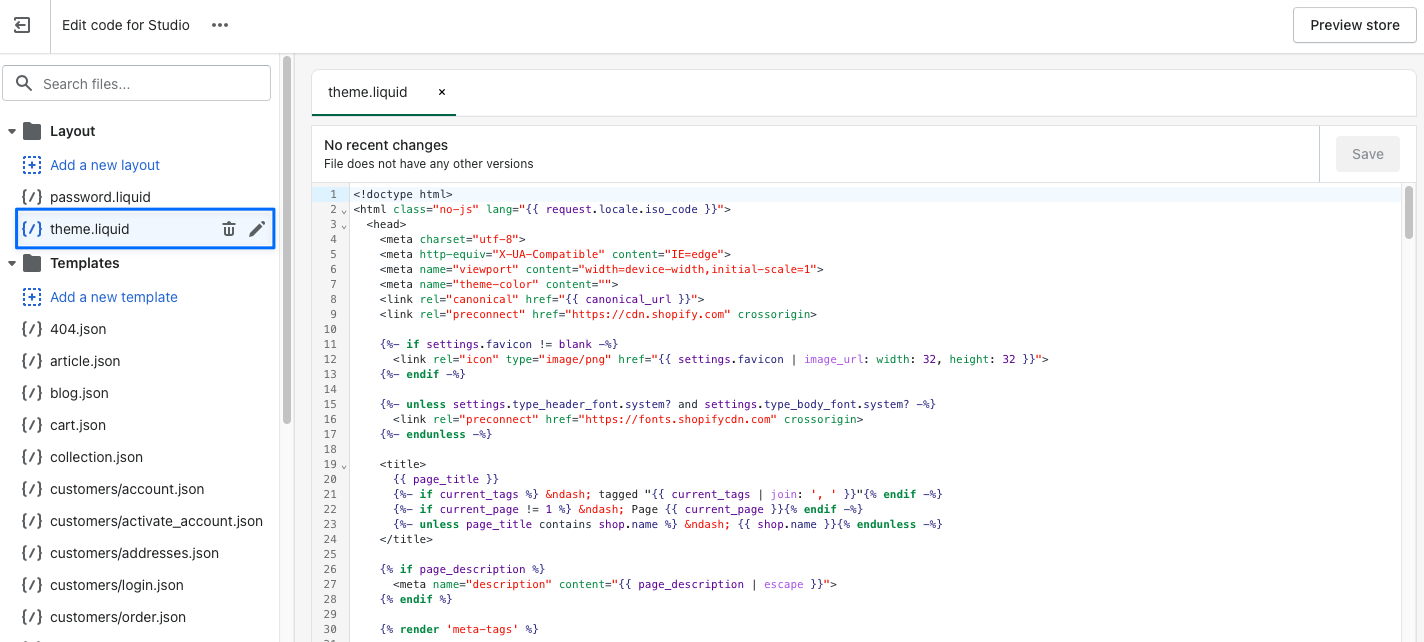
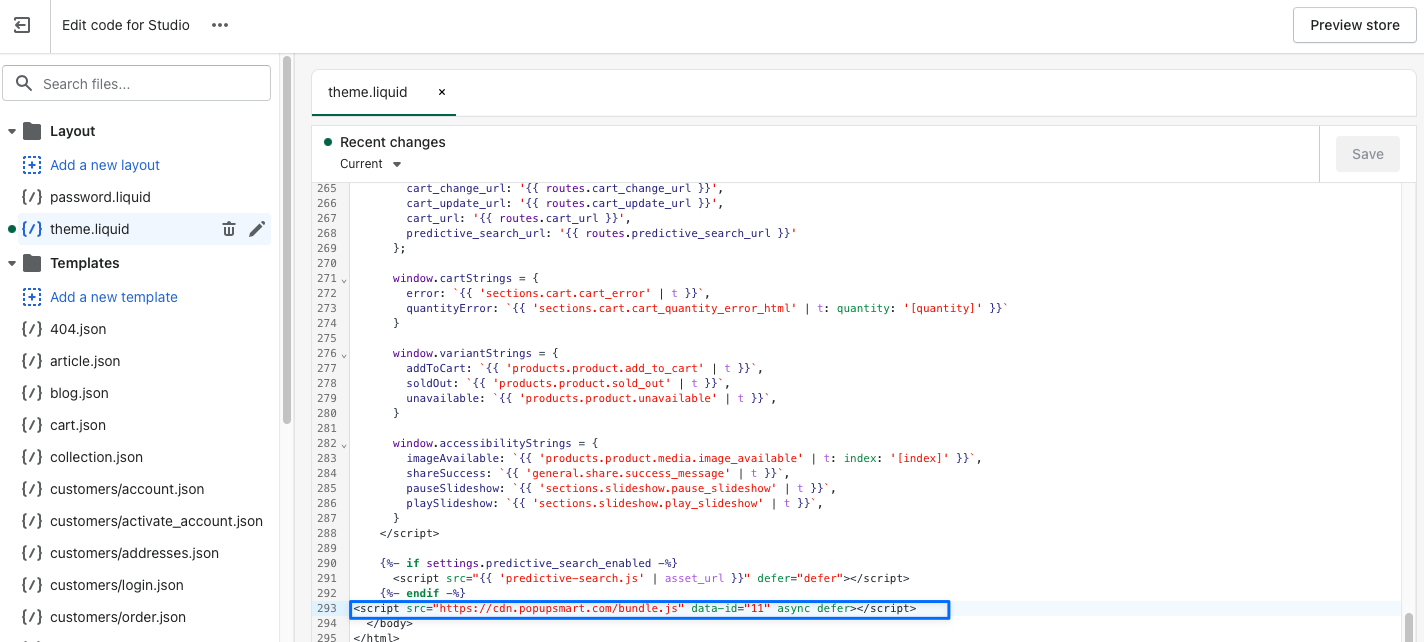
ALTERNATIVE METHOD: Embedding Popupsmart Code to the Shopify Store
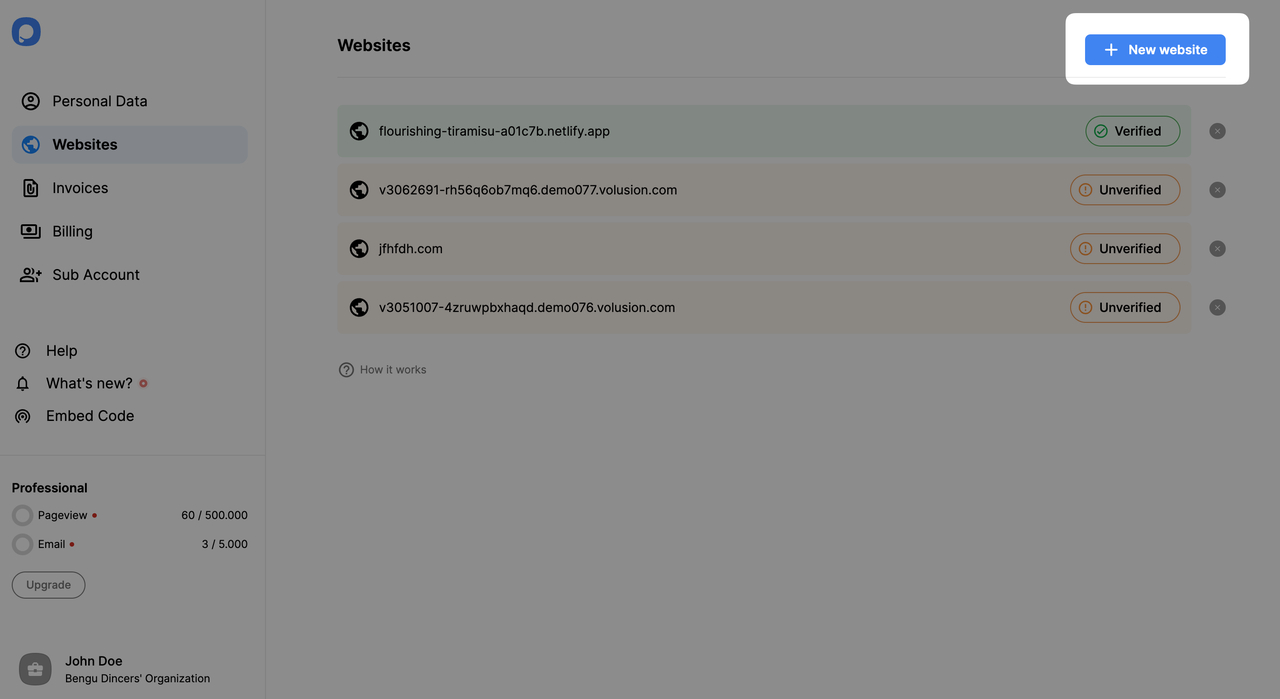
If you are unable to verify your site using Popupsmart App for Shopify as shown above or if you prefer to use a different method, you can manually verify your site by following the steps below.
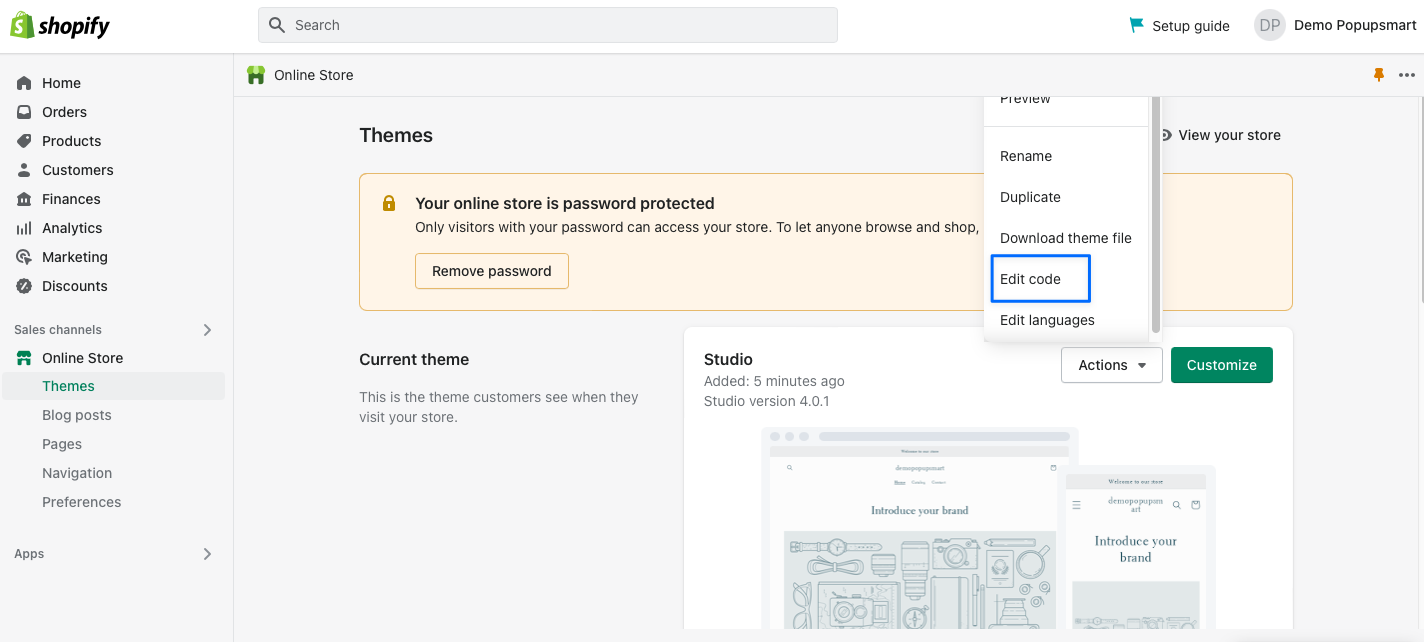
3. Then, go to your Shopify store’s “Online Store” section from the “Sales Channels” part. Go to the “Themes” section. From your theme’s “Actions” part, select “Edit Code,” as shown below.
Enter your website’s URL to the “Add a new website” modal and click on the “Save” button.
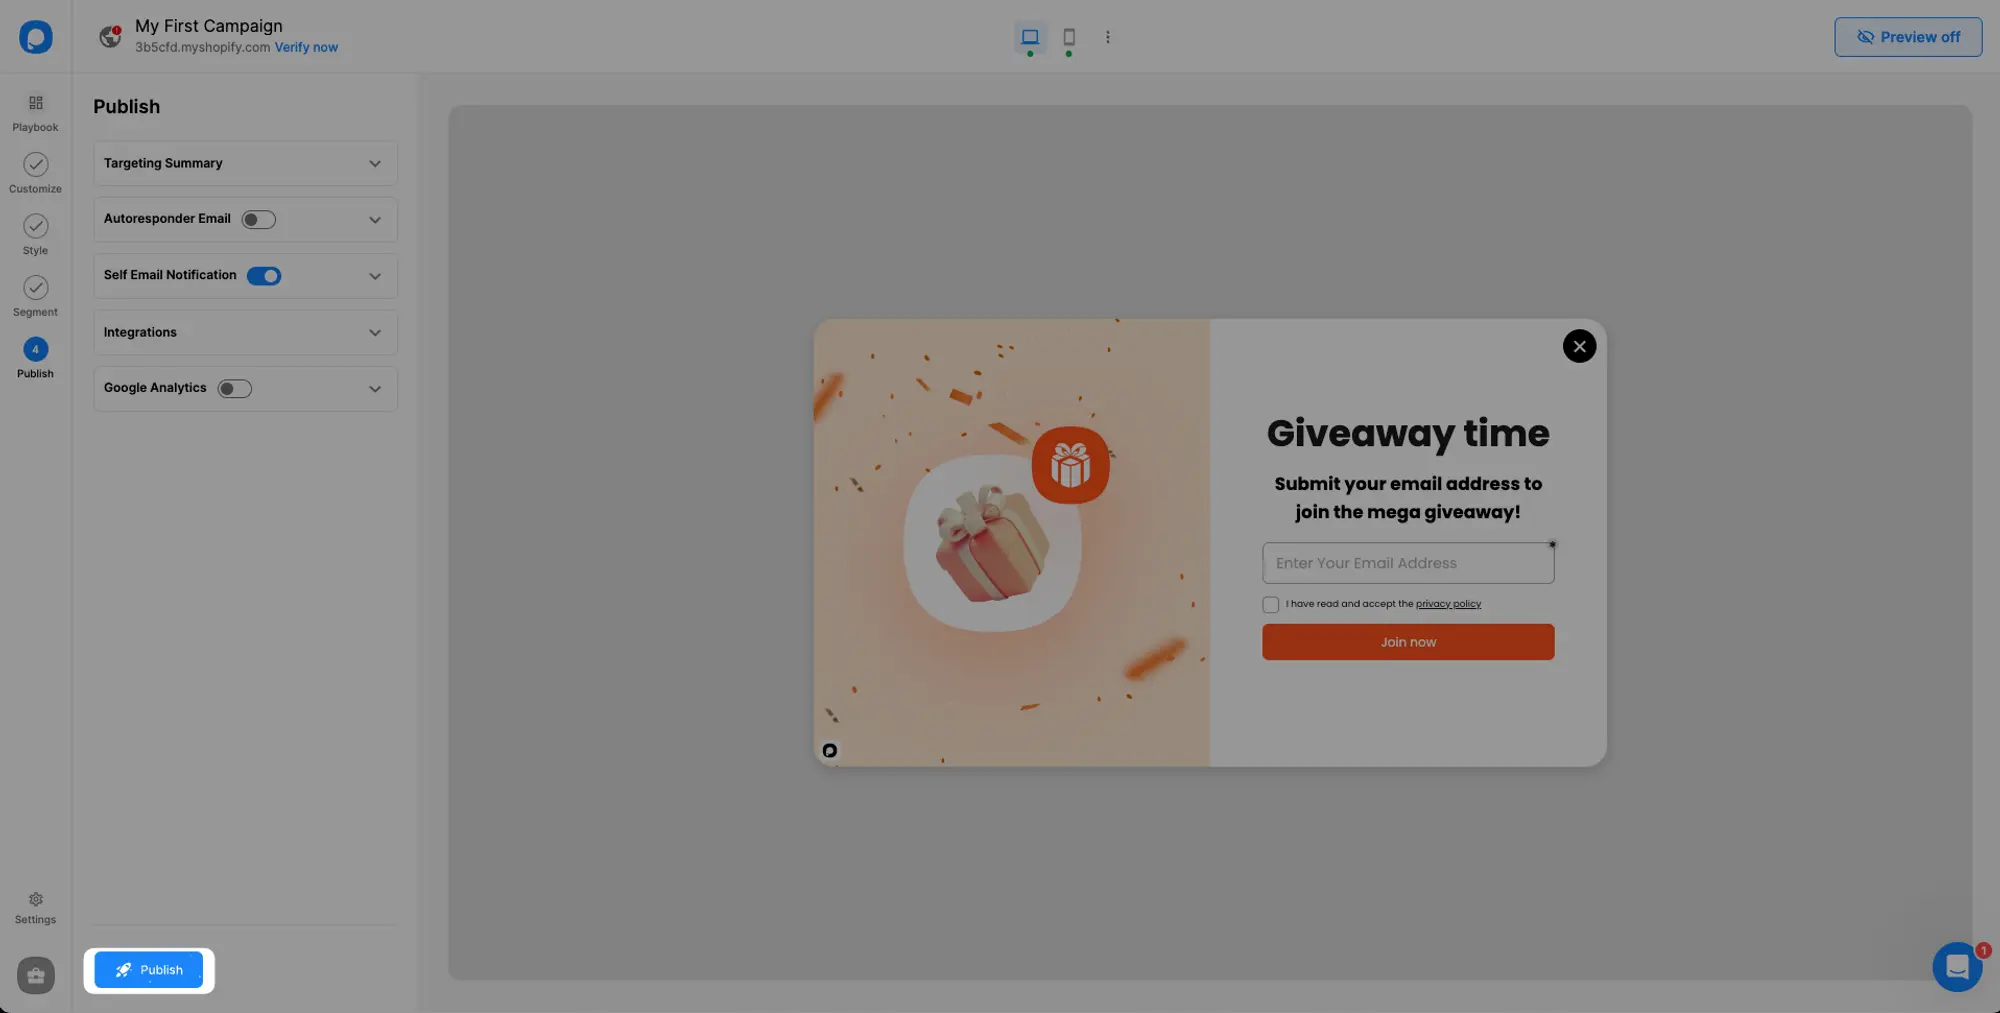
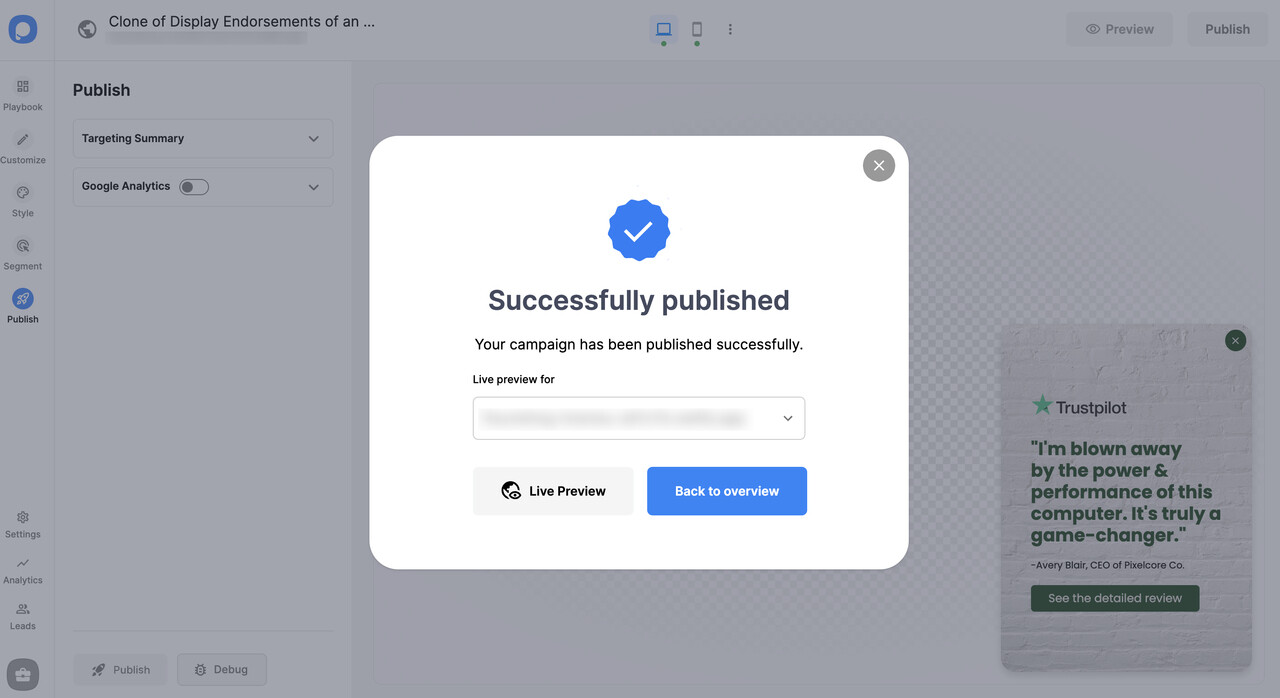
9. And now, build your popup campaign and customize it as much as you like. Then, click on the “Save” and “Publish” buttons. Your Shopify store’s popup will be published, and you will see the modal below when your campaign is successful.
This thread was GOLD! If you’re new, I suggest starting with Popupsmart’s Shopify app, then growing into more advanced segmenting and testing. Thanks everyone for making it easier
I’ve tried a few of these tools on Shopify, and honestly, adding a popup is way easier than it looks, no coding needed at all. If you want something quick, customizable, and mobile-friendly, tools like Popupsmart, OptiMonk, and Wisepops all get the job done, but I’ll share what the process looks like in general and what worked best for me.
Here’s basically how I set mine up:
I chose a popup tool (I used Popupsmart because the setup was fast, but the process is similar in all of them).
Connected my Shopify store, usually it’s just installing the app from the Shopify App Store and clicking “enable.”
Picked a template and customized the design (incentive text, colors, image, etc.) without touching any code.
Made sure it was mobile-friendly, most builders have a mobile preview, so just tweak spacing or text size.
Set targeting rules like “show on exit intent,” “after X seconds,” or “only on product pages” so it doesn’t annoy visitors.
Connected it to my email tool (Klaviyo, Mailchimp, etc.) so new leads go straight into my list.
Turned on analytics to track views, conversions, and signups.
From there, it was literally just hitting publish and the popup showed up instantly on my store.
If your goal is email capture + clean design without messing anything up, a third-party popup tool is definitely the easiest route. Happy to share more detailed steps if you have further questions.